P500 Obsessive winch install.

bigbore

bigbore

Well-Known Member
Jan 5, 2016
218
269
63
I'm probably going over the top on this, but...............

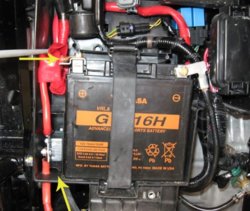
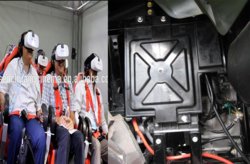
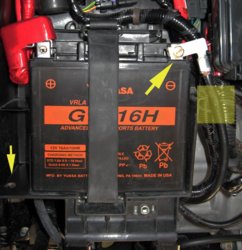
This is where I left off last weekend. Cutting the cover to free up the vertical wire channel, drilling the wire access hole and grinding off the corner of the negative terminal connector so I could tilt it up a little. The negative wire now clears the lip of the box and runs down the vertical shaft stress free.
Box1 zpsb9oqsnv0

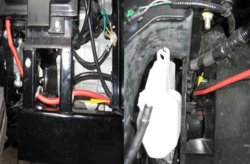
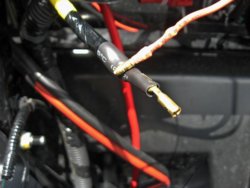
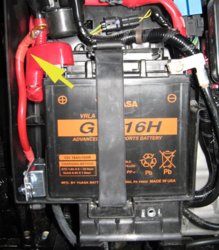
Today I cut the Short lead supplied by Tera, soldered on a new copper connector and then sealed it with a couple of layers of shrink wrap.
Wiring1 zps754jf1ni

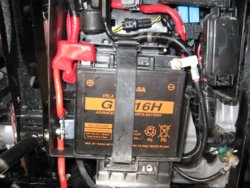
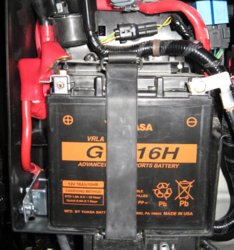
It even fits in the OEM terminal cover.
Wiring2 zpshxheowxr

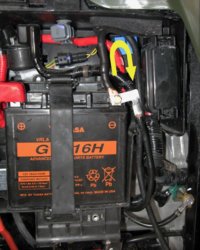
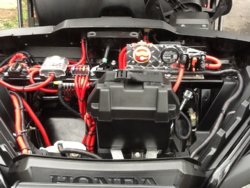
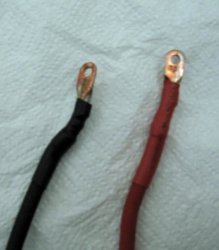
I bought two ten foot runs of solid copper stranded #4 so that I could relax and run to the front any way I wanted. Soldered copper terminal connectors and sealed them with shrink wrap.I should be able to close the box for the last time next weekend.
Wiring3 zpsqzejtec9
 
Last edited:
Montecresto

Montecresto

Montecresto el segundo
Lifetime Member
Supporting Member
Club Contributor
Jan 17, 2016
22,584
34,172
113
Eastern oklahoma
Ownership

  1. Other Brand

  2. 500

  3. 1000-3

  4. 1000-5

  5. Talon X4
Yep, those battery boxes are problematic. Mine is bulging after my mods. But it's complete, I didn't have to modify the cover, and it's very secure. I too shouldn't have to get back into it.
 
  • Like
Reactions: TR1
S

Sledge

Guest
O
I'm probably going over the top on this, but...............

This is where I left off last weekend. Cutting the cover to free up the vertical wire channel, drilling the wire access hole and grinding off the corner of the negative terminal connector so I could tilt it up a little. The negative wire now clears the lip of the box and runs down the vertical shaft stress free.
View attachment 15180

Today I cut the Short lead supplied by Tera, soldered on a new copper connector and then sealed it with a couple of layers of shrink wrap.
View attachment 15181

It even fits in the OEM terminal cover.
View attachment 15182

I bought two ten foot runs of solid copper stranded #4 so that I could relax and run to the front any way I wanted. Soldered copper terminal connectors and sealed them with shrink wrap.I should be able to close the box for the last time next weekend.
View attachment 15183

Obsessive gets an undeserved bad rep. Ain't a bad thing, when properly focused, as in this case.

Nice work, Sir.

Joe
 
  • Like
Reactions: JTW
bigbore

bigbore

Well-Known Member
Jan 5, 2016
218
269
63
Another chapter on the longest, and hopefully neatest winch install ya never saw...............

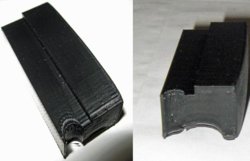
Positive side. Made a little custom part on my new 3D to take up the extra space in the box at the bottom under the breaker. Just lookin' for stuff to print..........
PosSide zps0oqc4ssb

Little part
Part zpskku8h0bq

Positive side done........
PosDone zpsjmee7pva

Negative side. A little loop and...........done.
NegDone zps48reivym

Box cover slid right on, even sweeter than factory. The crowd following along online was understandably impressed.
BoxDone2 zpsb81ppoya

Took the common route to the front. I cut shrinkwrap into 4" pieces and bound the two cables every 18", made for a neat run. You can barely see two of the shrinkwrap pieces if ya care.
Route zpsxzxg484w

Next I'll mount the winch, and then tie it all together with the last of the electrical work.
 
  • Like
Reactions: Shadesmn
bigbore

bigbore

Well-Known Member
Jan 5, 2016
218
269
63
You can mount the ground cable along with the factory grounds right next to the battery box. That's how the Honda accessory winch is done.

That would have been a little easier, I don't recall seeing it done way in any of the posts I read. Someone may have pointed it out, I just didn't notice it. The way I did it wasn't difficult but the ground point you mention is more efficient.
 
lone wolf

lone wolf

New Member
May 7, 2016
22
18
3
Florida
I was thinking of running the relay up to the front under the hood I was in fear that water getting in contact with it back there would cause issues . what is your thoughts on that .
 
lone wolf

lone wolf

New Member
May 7, 2016
22
18
3
Florida
I was thinking of running the relay up to the front under the hood I was in fear that water getting in contact with it back there would cause issues . what is your thoughts on that .
good post and visuals .
 
lone wolf

lone wolf

New Member
May 7, 2016
22
18
3
Florida
sorry I was talking about the circuit breaker you have next to the battery
 
advertisement
bigbore

bigbore

Well-Known Member
Jan 5, 2016
218
269
63
I was thinking of running the relay up to the front under the hood I was in fear that water getting in contact with it back there would cause issues . what is your thoughts on that .
You corrected to "circuit breaker". My concerns about mounting up front would be insulating the contacts and finding a location for a strong mount. You don't want those leads to get loose and contact anything. If you can confidently solve those two problems, mounting higher, and dryer, will be better IMO.

The current location is a quick, easy, known solution that offers reasonably good access for service. It does seem to be susceptible to moisture and corrosion though, especially if you frequent deeper water. I didn't check to see how water tight the unit is, it would be interesting to have a more thorough analysis of the units resistance to moisture.
 
bigbore

bigbore

Well-Known Member
Jan 5, 2016
218
269
63
It also works good to use "flex tubing" (5/16" or 3/8" depending on 6 or 8 ga. cable) on the whole length of the cables to prevent them from rubbing thru.

I considered flex tubing but the stuff that I see was split the entire length and I didn't feel it offered enough of an advantage over what I did for this particular run to justify the additional expense or work. The run is well protected, the cable is good quality and it is secured. Honda obviously disagrees with me since I lashed my cables to their flex tubing.;)
 
Montecresto

Montecresto

Montecresto el segundo
Lifetime Member
Supporting Member
Club Contributor
Jan 17, 2016
22,584
34,172
113
Eastern oklahoma
Ownership

  1. Other Brand

  2. 500

  3. 1000-3

  4. 1000-5

  5. Talon X4
I plan on running it in flex tubing along the same wire path of manufacture .
Thanks
Yes, run it in flex tubing and keep relays and circuit breakers up front, mounted high on the frame crossmember.
 
bigbore

bigbore

Well-Known Member
Jan 5, 2016
218
269
63
Yes, run it in flex tubing and keep relays and circuit breakers up front, mounted high on the frame crossmember.
I would be interested in a detailed photo of your circuit breaker mounting. I'm interested in seeing how it is isolated.
 
Montecresto

Montecresto

Montecresto el segundo
Lifetime Member
Supporting Member
Club Contributor
Jan 17, 2016
22,584
34,172
113
Eastern oklahoma
Ownership

  1. Other Brand

  2. 500

  3. 1000-3

  4. 1000-5

  5. Talon X4
I would be interested in a detailed photo of your circuit breaker mounting. I'm interested in seeing how it is isolated.
I have three. One is in the OEM battery box, as they are to be close to the battery, the other two are up front close to the dual battery. They all are 100 amp. There's one on the right near the ISO switch and one on the left near the winch contractor.

Image
 
  • Like
Reactions: Shadesmn
bigbore

bigbore

Well-Known Member
Jan 5, 2016
218
269
63
I have three. One is in the OEM battery box, as they are to be close to the battery, the other two are up front close to the dual battery. They all are 100 amp. There's one on the right near the ISO switch and one on the left near the winch contractor.

View attachment 16467

Is that a P500? It looks like there are hood lock receptacles in the center of the photo. You have done an outstanding job retrofitting!
 
  • Like
Reactions: CURTK
Montecresto

Montecresto

Montecresto el segundo
Lifetime Member
Supporting Member
Club Contributor
Jan 17, 2016
22,584
34,172
113
Eastern oklahoma
Ownership

  1. Other Brand

  2. 500

  3. 1000-3

  4. 1000-5

  5. Talon X4
Is that a P500? It looks like there are hood lock receptacles in the center of the photo. You have done an outstanding job retrofitting!
Yes it is, and thank you.
 
  • Like
Reactions: lone wolf
ehart814

ehart814

Well-Known Member
Lifetime Member
Club Contributor
Mar 28, 2016
1,655
3,643
113
NWPA
Ownership

  1. 500

  2. 1000-5
sorry I was talking about the circuit breaker you have next to the battery
Maybe a little late to the party here, but if you only have one circuit breaker, It should be mounted as close as possible to the battery terminal. If the circuit breaker is mounted at the front, a short could occur anywhere between the battery and the circuit breaker and you won't be protected.
 
  • Like
Reactions: sibermage
Montecresto

Montecresto

Montecresto el segundo
Lifetime Member
Supporting Member
Club Contributor
Jan 17, 2016
22,584
34,172
113
Eastern oklahoma
Ownership

  1. Other Brand

  2. 500

  3. 1000-3

  4. 1000-5

  5. Talon X4
I was thinking of running the circuit breaker and solenoid box under the hood.
Solenoid box (contactor) under the hood, circuit breaker in the OEM battery box, unless you're planning on installing a dual battery and powering the winch from it, in which case, the circuit breaker should be installed under the hood close to your dual battery.
 
Last edited:
  • Like
Reactions: ehart814
bigbore

bigbore

Well-Known Member
Jan 5, 2016
218
269
63
I finished installing my winch Sat. afternoon. I have to confess to taking a few short cuts so that I was able to ride on Sunday. Had I continued to obsess over minutiae, I would have missed the last day to ride before they closed the area for the season, so I started going crazy with the tie wraps. I'll probably revisit some of these things in the future but I had to decide whether it was all about gear or riding.

Winch mounted, cables connected. Run straight back, nothing much here. Ignore the new mudders.
MntedWinch zpsfottl992

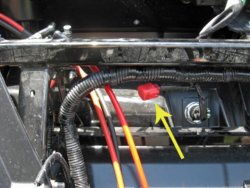
I located the accessory harness plug on the P500 harness. It had black electrical tape around it so its location was not immediately apparent. It was taped to the underside of the crossmember.
AccPlug zpsbjjpxe6n

I took the cap off of the plug. Here, the accessory harness is laying on top of the crossmember along with the P500 harness plug.
AccPlugs zpsw37trqcg

The accessory harness had a reducer or adapter inside that prevented me from plugging it in at first. "A trap for young players", as the Aussies will say.
AccPlgRing zpszbjhq4cb

I plugged in the mini harness and strapped it to the crossmember. It seemed to be relaxed with two of the accessory leads tucked behind the fender, also strapped to the crossmember so they aren't flopping around.
AccPlgStrapped zpsjq6pznic

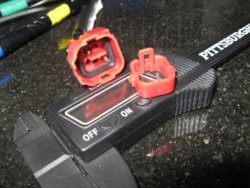
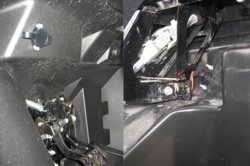
I took the blue tape off the yellow wire set and clipped off the end with the male lead. I soldered the male lead to the hot on the winch remote cable receptacle and heat shrink wrapped everything. You don't need the male ground, its grounded through the solenoid.
PrepLeads zpsxri1cxzh

Mounted the remote cable receptacle. I tested the location and it did not interfere with the vehicle operation. This was confirmed in the field the next day. I only had time to mount one switch, this can be operated from inside OR outside the cab VERY effectively. Where the dash meets the mounting bracket, a channel is formed; I laid the wire in it where it was captured quite well as it ran to the solenoid.
Handswitch zpspta12l1h

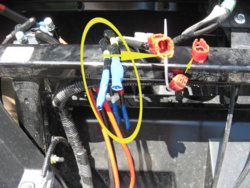
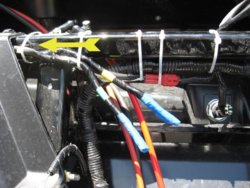
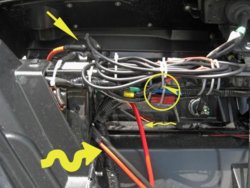
The remote winch cable receptacle wire was looooong. It really bothered me to wrap & strap like this but it was getting late and I had trailer prep yet to do so it was all about riding at this point. Thick yellow squiggly are the leads from the battery, thin yellow squiggly is the winch hot, straight arrow points to solenoid properly wired with all leads covered and the circle has the accessory harness plug and the winch remote cable hot.
Done zpsf8oxh50w

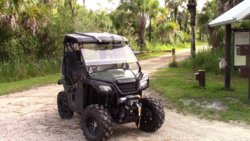
Mission accomplished on time. Video to follow.
SmRig zpsyzqim97y
 
Last edited:
advertisement

About us

  • Our community has been around for many years and pride ourselves on offering unbiased, critical discussion among people of all different backgrounds. We are working every day to make sure our community is one of the best.

User Menu

Buy us a beer!

  • Lots of time and money has gone into making sure the community is running the best software, best designs, and all the other bells and whistles. Care to buy us a beer? We'd really appreciate it!

    Beer Fund!

    Club Membership!