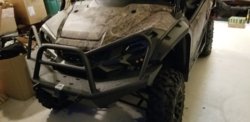
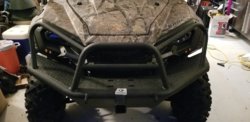
P1000 OnTheJob's P1K-3 Build: "The Pie-O-Near"

P

Polcat1979

New Member
Apr 6, 2019
4
2
3
Vinton, Ohio
Ownership

  1. 1000-5
@OnTheJob
Now that it’s getting hotter, how is the “cooling” fan doing? I have a 1k-5 and my back seaters complain of the heat and steam if we hit a water hole.
Also what size fan did you install?

Thanks!!
 
  • Like
Reactions: Trueblood85
OnTheJob

OnTheJob

Well-Known Member
Dec 29, 2017
426
925
93
Bristol, NY
Ownership

  1. 1000-3
That's a 7" fan. I really does a great job cooling off the front seat. The problem is I have to imagine all that heat gets blown towards the back. Back seat passengers might not like that. I only have a 3-seater so a non issue for me. I wonder if you could hook up a second fan for the rear?
 
  • Like
Reactions: Polcat1979
M

mjleblanc

Member
Sep 23, 2019
31
76
18
Camas, WA
Ownership

  1. 1000-5
Next up was a battery tender:View attachment 65712

NOCO Genius G1100

View attachment 65713

With a port plug for a standard 110v extension cord. Had to drill a 2 inch hole through the fender. Nothing under there to bump into.

View attachment 65714

I picked the passenger side because it's closest to the outlet and I have to walk by it anyway to get to the driver's seat. Very simple install. The battery tender plugs in the port plug. Had to buy a separate pigtail that plugs into the battery charger in lieu of the large alligator clips it comes with. There are two sizes and I got the small 1/4" ring terminals.

View attachment 65715

It charges the main battery first and then when it reaches 12.8v it open the True Isolator and begins charging the AUX battery. There isn't any hesitation when I start her up cold now.
Parts list:
Charger: https://www.amazon.com/gp/product/B004LX3AXQ/?tag=sxsweb24-20
Port plug: https://www.amazon.com/gp/product/B009ANV81S/?tag=sxsweb24-20
Terminal connector: https://www.amazon.com/gp/product/B004LWQ35Y/?tag=sxsweb24-20

I'm considering getting one of these for each of the batteries to keep the them from freezing when it gets in the single digits. They plug into a 110v line and I was thing of pig-tailing that int the plug port:

https://www.amazon.com/dp/B000I8XDBM/?tag=sxsweb24-20

Anyone have any experience or feedback on the idea?

I've got a winch coming on Thursday so that will be the weekend project......


Hi, I am new to the forum, and I wanted to ask how the tender set up worked out, and if you could elaborate on the wiring needed? How does it tie into the isolator, etc?

Thanks!!
 
Fastbuck101

Fastbuck101

Member
Dec 8, 2018
53
84
18
New Mexico
Ownership

  1. 1000-5
Hi, I am new to the forum, and I wanted to ask how the tender set up worked out, and if you could elaborate on the wiring needed? How does it tie into the isolator, etc?

Thanks!!
Next up was a battery tender:View attachment 65712

NOCO Genius G1100

View attachment 65713

With a port plug for a standard 110v extension cord. Had to drill a 2 inch hole through the fender. Nothing under there to bump into.

View attachment 65714

I picked the passenger side because it's closest to the outlet and I have to walk by it anyway to get to the driver's seat. Very simple install. The battery tender plugs in the port plug. Had to buy a separate pigtail that plugs into the battery charger in lieu of the large alligator clips it comes with. There are two sizes and I got the small 1/4" ring terminals.

View attachment 65715

It charges the main battery first and then when it reaches 12.8v it open the True Isolator and begins charging the AUX battery. There isn't any hesitation when I start her up cold now.
Parts list:
Charger: https://www.amazon.com/gp/product/B004LX3AXQ/?tag=sxsweb24-20
Port plug: https://www.amazon.com/gp/product/B009ANV81S/?tag=sxsweb24-20
Terminal connector: https://www.amazon.com/gp/product/B004LWQ35Y/?tag=sxsweb24-20

I'm considering getting one of these for each of the batteries to keep the them from freezing when it gets in the single digits. They plug into a 110v line and I was thing of pig-tailing that int the plug port:

https://www.amazon.com/dp/B000I8XDBM/?tag=sxsweb24-20

Anyone have any experience or feedback on the idea?

I've got a winch coming on Thursday so that will be the weekend project......


I went with 2 Battery Tenders, one for each battery. I wasn't sure if the True isolator would switch & charge both batteries, since the tender puts out about 13.5 volts. Either way, it works great, no issues at all with starting, lo volts, etc.
 
M

mjleblanc

Member
Sep 23, 2019
31
76
18
Camas, WA
Ownership

  1. 1000-5
I went with 2 Battery Tenders, one for each battery. I wasn't sure if the True isolator would switch & charge both batteries, since the tender puts out about 13.5 volts. Either way, it works great, no issues at all with starting, lo volts, etc.


I had that thought as well, and opted for the NOCO Genius GENM2 8 Amp 2-Bank. 1 unit can handle both batteries.
 
  • Like
Reactions: DanDan
OnTheJob

OnTheJob

Well-Known Member
Dec 29, 2017
426
925
93
Bristol, NY
Ownership

  1. 1000-3
Hi, I am new to the forum, and I wanted to ask how the tender set up worked out, and if you could elaborate on the wiring needed? How does it tie into the isolator, etc?

Thanks!!

I hooked it up to the main OEM battery only. While plugged into the battery tender, when the charge on the main battery reaches 12.7 volts, the isolator opens up and begins to charge the accessory battery as well. I'd have to research what voltage is put out when it goes in to trickle charge mood but every time I check it both batteries are fully charged and fairly equally in the 13 volt range. It's been a great set up for the colder months. I don't plug it in the summer unless I'm going to be away from the machine for an extended amount of time.
 
  • Like
Reactions: DanDan
M

mjleblanc

Member
Sep 23, 2019
31
76
18
Camas, WA
Ownership

  1. 1000-5
20190930 140037
Good idea, where did you mount it?

I placed it on top of the storage cubby mold. Bored out the mounting holes to 1/4", then ran 3" bolts from inside the cubby through large washers, then washers and nuts on top of the unit
20190930 141015
20190930 140042


Works great. Second battery arrives this week. 20190930 140037
 
N

noisewater

Active Member
Aug 3, 2017
59
188
33
west michigan
Ownership

  1. 1000-5
Having an issue. Wired the dpdt according to the wiring diagram from the first page. Turn the key on and nothing lights up. Nothing happens at all. When I turn the key all the way to fire it up the lights work until I release the key (pioneer is running). So the machine is running and mone of my switches light up. They only light momentarily when the machine is cranking over.
 
advertisement
N

noisewater

Active Member
Aug 3, 2017
59
188
33
west michigan
Ownership

  1. 1000-5
Also getting no volt reading from my main battery. It's lit when I turn the aux on. The aux reads fine but the main reads 0.0 or 0.1.
 
N

noisewater

Active Member
Aug 3, 2017
59
188
33
west michigan
Ownership

  1. 1000-5
Heh. Also also. Is the true isolator light supposed to be on all the time? The thing ain't shut off in an hour and is still lit
 
N

noisewater

Active Member
Aug 3, 2017
59
188
33
west michigan
Ownership

  1. 1000-5
Nvmnd. All a matter of that black/white acc wire. Think it was mentioned many times here that any of the 2 were fine.
PSA: There's way more than 2 (on a '16 1K-5) and it does matter. My own damn fault for not hitting it with my tester beforehand.
 
TripleB

TripleB

Well-Known Member
Lifetime Member
Aug 13, 2018
15,251
136,237
113
Caryville, Tennessee
Ownership

  1. 1000-3

  2. 1000-5
Nvmnd. All a matter of that black/white acc wire. Think it was mentioned many times here that any of the 2 were fine.
PSA: There's way more than 2 (on a '16 1K-5) and it does matter. My own damn fault for not hitting it with my tester beforehand.
I tapped the wrong 1 the 1st time also.
 
  • Like
Reactions: CumminsPusher
OnTheJob

OnTheJob

Well-Known Member
Dec 29, 2017
426
925
93
Bristol, NY
Ownership

  1. 1000-3
Mud Busters installed:

1517F51D 1DF4 48DC 9673 86B22F2B6856


1512511C BC65 4BC3 A5C1 E8CA0828E27F


$169 with the Hondasxs.com discount code and they were offering free shipping. I got the full front and standard rear coverage.

9E908DB1 3238 4E81 AD55 A872BEAFFB14


58A644E4 49F1 4CD4 B597 6699C7E9C869

I was really getting sick of the mud that built up on the step behind the door. I have been eyeing these for more than a year. I saw someone do them for a fraction of the cost that looked pretty good. Then I saw there was a discount code that brought these down to $169 and I pulled the trigger.

FD72A3D6 15C7 460D AECB 63B16A9892ED


The install was okay. I didn't have a 19/64" drill bit so I used a 5/16" which worked fine for the plastic rivets. There are two different sized screws and it appeared I was shorted a longer one and had an extra short one so that caused a little delay in the installed because I removed and reinstalled all the screws trying to figure out if I made a mistake.

6ECA4D34 6971 4FDD AB2C 7A455A242174

Overall I am very pleased with these mudflaps. They look factory installed and have excellent coverage. I hope they hold up if I tap a tree.
 
Last edited:
dnjones161

dnjones161

Well-Known Member
May 30, 2018
583
1,713
93
Ohio
Ownership

  1. 1000-5
$169 was a steal for the full set! Good grab!
 
M

mjleblanc

Member
Sep 23, 2019
31
76
18
Camas, WA
Ownership

  1. 1000-5
Added so far:

GMRS Vertical Base Antenna
Midland MX400 GMRS Radio
Tough Country bumper
Turn signals and horn
Bed liner
Roof


Still going.......
 
advertisement

About us

  • Our community has been around for many years and pride ourselves on offering unbiased, critical discussion among people of all different backgrounds. We are working every day to make sure our community is one of the best.

User Menu

Buy us a beer!

  • Lots of time and money has gone into making sure the community is running the best software, best designs, and all the other bells and whistles. Care to buy us a beer? We'd really appreciate it!

    Beer Fund!

    Club Membership!