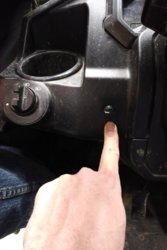
P1000 OnTheJob's P1K-3 Build: "The Pie-O-Near"

OnTheJob

OnTheJob

Well-Known Member
Dec 29, 2017
426
925
93
Bristol, NY
Ownership

  1. 1000-3
I'm new to the forum. Thanks for this detailed thread. I especially appreciate the large, high-quality pictures and links to the items you utilized.

I'm adding a winch, second battery, isolator, etc. and your tutorial has me just about tuned up and ready to install.

I do have just a few questions though:

1. Does your winch have any type of fuse or breaker on the power wire or does the solenoid offer protection?

2. Would it mater if the Auxiliary ground wire went to the Buss and the then to the Aux battery as opposed to the way you have it wired? (battery first the Buss)

3. Do you happen to know which model of mighty max battery fits in the stock location? Since I'm adding an odyssey as the aux battery, it seems like a good time to also upgrade my 2 year old stock battery.

Thanks and I hope you had a great Thanksgiving.

Thank you very much. Most everything I did, I copied from others on here in some form or another. Detailing on here has also kind of created a log of sort, of what I have done and how I did it in case I have to go back and trouble shoot something or someone asks how I did it.

Responses to your questions:

1. It is my understanding the winch solenoid offers protection so I did not add a fuse breaker. I originally wired the winch power after my 100 amp breaker but after thinking about it, that is wrong because I am only limiting 100 amps going to the winch instead of upwards to 300 amps directly from the battery.

2. I don't think it would matter about the ground. My thinking was sending a ground wire from the engine to the battery first would make it easier to trouble shoot a grounding connection problems.

3. I don't know the model that fits in the stock battery location. I am seriously considering replacing the stock battery as well. This one is very weak and has difficulty starting the machine on cold days. The Mighty Maxx battery has been very good to me and I may go that way as well.

Hope that helps
 
  • Like
Reactions: BWAF
DanDan

DanDan

Well-Known Member
Lifetime Member
Dec 2, 2018
193
332
63
Greenville, tejas
Ownership

  1. 1000-5
This was came today, a Koplin Rhino Gun Mount:

https://www.amazon.com/gp/product/B006OZF6PY/?tag=sxsweb24-20

View attachment 65397


I originally wanted to mount it behind me but there was no room for the clamps between the ROPS and the back panel. I'm going to try this location out for now. It does not block any of my vision and my head isn't anywhere near it. It sits much higher than I thought it would.

View attachment 65398
View attachment 65400
It's a very secure mount. I didn't use the rubber cushions because I couldn't get them in there but does not slip at all when I try to move them. No creaking from them underway either.

View attachment 65399

The gun doesn't budge at all. Just press two large rubber buttons and the top arms release. Squeeze them together and they ratchet tight on to the gun.
Have you looked at the Devil Dog concepts Hard Charge Handle for your AR?
 
  • Like
Reactions: Smitty335
OnTheJob

OnTheJob

Well-Known Member
Dec 29, 2017
426
925
93
Bristol, NY
Ownership

  1. 1000-3
Engine Bilge Fan

Next on my list was a reversible engine fan. Upstate NY sees temps up in the mid 90's on a regular bases and down to the single digits to below zero occasionally. I have the heat shield kit under the seat when I did the vent line extensions.

" The Original " Honda Pioneer 1000 Heat Shield's 1&2 + Vent Extension Package | eBay

$22:
https://www.amazon.com/gp/product/B00T3T7IJU/?tag=sxsweb24-20

A couple times this summer the seat got warm but not unbearable. I like having an enclosure because of the of changing weather up here. I also plan on plowing this winter and enclosing the cab with fabric doors that I only intend on having on during the winter months. So I wanted to have an engine fan that was reversible: One way cools the engine, off, the other way heats the cab.

View attachment 84828

I was unsure about a marine bilge blower in the engine compartment because of the severe heat and moisture. I haven't seen anything about the engine melting a bilge fan yet but I wanted to try this when I found this cheap option. It keeps the fan motor in the cooler drier cab. This one also pushes 3X air than most bilge blowers and was half the cost so I thought I'd give it a try.

View attachment 84883

It sticks out into the cab about 2.5" but it's not a problem at all for me where it is. I sat in the middle to check it out and it wouldn't affect a third passenger. What I don't like is the ugly duct tape I had to temporarily use to close that gap. I'd like to come up with a better solution for that.

View attachment 84884

I bought a DPDT switch that I wired to be able to reverse the direction of the fan. Wiring the switch was actually pretty easy. I fused it at 15 amps because I saw somewhere they spike up to 120 watts at start up and then 80 watts continuously running normally.

View attachment 84885

The fan blades are directional so I flipped them so they push air towards the engine compartment. Wow it does push a lot of air. It is noisier than I'd hoped but once the engine is running you don't notice it. It'd be cool to put some sort of "dimmer switch" next to it to regulate the fan speed.

View attachment 84886

When I reverse the fan it blows plenty of air into the cab. I took it out for a hard ride in 75 degree weather and tried to get the engine hot. It does blow some pretty warm air into the cab. The seat never got warm at all. I'd like to try it out in some 90 degree temps and colder temps to see if this was worth it. I have a feeling it will do its job.

View attachment 84887

The positives are it blows a lot of air so no more hot seat and it was a cheap/easy mod. The negatives is it is noisy (but so is the whole machine) and ugly. If I get annoyed looking at it, I'm considering mounting/flipping it to the inside of the seat and putting a grille on the passenger side. Not sure how that would hold up exposed to heat/mud/water. Just a thought. I'll probably get use to it. Next I'm going to try and find a way to defrost the windshield for the coming winter months.

Bilge Fan Heat Update:

Last weekend was the first really cold spell where I ran the machine for several hours. Previously when I ran it for 20-30 minutes and then the bilge fan in reverse, it never really got hot enough to get heat from the engine. The fan also runs too fast (and loud) to run it in reverse for heat to feel a difference.

It went down to -7 one morning when I was plowing 14". After about 30 minutes I started to run the bilge fan in reverse for heat. It was warm but not at all hot. It was also blowing way too fast. I need to find a switch to make it a variable speed fan. I probably only need 10-25% fan speed in reverse to get some heat in there and not be annoyed by the fan noise. I did get some heat in the cab and I was comfortable without gloves or a hat. The noise was more annoying than the heat received.
 
CumminsPusher

CumminsPusher

Just a Honda doing Honda things.
Lifetime Member
Supporting Member
Club Contributor
Oct 14, 2015
42,070
322,784
113
Washington/Idaho
Ownership

  1. Other Brand

  2. 1000-5

  3. Talon X LV
There’s a access hole in the front of the floorboard directly behind the radiator that comes out with two Allen bolts. Take that out and with the machine warmed up it’ll bring in way more heat then fans underneath the seat do.
We had a couple 3in fans under seat and I will probably do that again but the above mentioned is quick free heat.
 
OnTheJob

OnTheJob

Well-Known Member
Dec 29, 2017
426
925
93
Bristol, NY
Ownership

  1. 1000-3
Try one of these.
https://www.amazon.com/gp/aw/d/B073R7H52B?tag=sxsweb24-20
I used one in my dash to control led strips for interior lighting. I pulled the knob off and distected it to surface mount.
Confirm amp draw of fan. Might get lucky.

According to the reviews those are rated at .8 amps which is perfect for LED. I also need the switch to be able to handle reverse polarity because the fan goes in both directions from the 3-way dash switch.

There’s a access hole in the front of the floorboard directly behind the radiator that comes out with two Allen bolts. Take that out and with the machine warmed up it’ll bring in way more heat then fans underneath the seat do.
We had a couple 3in fans under seat and I will probably do that again but the above mentioned is quick free heat.

I will have to give that a try as well.
 
Neohio

Neohio

Beast of the East
Lifetime Member
Supporting Member
Club Contributor
Dec 22, 2016
21,537
91,146
113
Painesville Ohio
Ownership

  1. 1000-5
According to the reviews those are rated at .8 amps which is perfect for LED. I also need the switch to be able to handle reverse polarity because the fan goes in both directions from the 3-way dash switch.


I will have to give that a try as well.
Put the potentiometer before the switch.
 
  • Like
Reactions: DanDan and BWAF
advertisement
Neohio

Neohio

Beast of the East
Lifetime Member
Supporting Member
Club Contributor
Dec 22, 2016
21,537
91,146
113
Painesville Ohio
Ownership

  1. 1000-5
Good idea. I wanted to put it next to the fan because I'm out of dash space.
I mean't wire it before the switch. So it supplies variable voltage to the fan.
I took it out of the case and mounted on the dash.
IMG 20181206 1958489
 
Muhkan51

Muhkan51

Love this thing!
Lifetime Member
Supporting Member
Feb 9, 2018
32
41
18
Louisiana
Ownership

  1. 1000-3
Just wanted to say I have thoroughly enjoyed your build, from start to present. Great job on the machine and a bunch of useful information that has helped me and hopefully many others. Well done!
 
OnTheJob

OnTheJob

Well-Known Member
Dec 29, 2017
426
925
93
Bristol, NY
Ownership

  1. 1000-3
Just wanted to say I have thoroughly enjoyed your build, from start to present. Great job on the machine and a bunch of useful information that has helped me and hopefully many others. Well done!

Thanks. I owe it all to those who came before me.
 
  • Like
Reactions: Mudwing
jwfirebird

jwfirebird

Well-Known Member
Sep 23, 2018
927
1,446
93
western ny
Ownership

  1. 700-2
Thank you very much. Most everything I did, I copied from others on here in some form or another. Detailing on here has also kind of created a log of sort, of what I have done and how I did it in case I have to go back and trouble shoot something or someone asks how I did it.

Responses to your questions:

1. It is my understanding the winch solenoid offers protection so I did not add a fuse breaker. I originally wired the winch power after my 100 amp breaker but after thinking about it, that is wrong because I am only limiting 100 amps going to the winch instead of upwards to 300 amps directly from the battery.

2. I don't think it would matter about the ground. My thinking was sending a ground wire from the engine to the battery first would make it easier to trouble shoot a grounding connection problems.

3. I don't know the model that fits in the stock battery location. I am seriously considering replacing the stock battery as well. This one is very weak and has difficulty starting the machine on cold days. The Mighty Maxx battery has been very good to me and I may go that way as well.

Hope that helps

1. solenoid is not protection from burning up wires, you need a fuse or breaker at the battery. it is a switch that allows low current control of the high current motor, like dash switch and remote to control the high current motor. also controls the motor polarity for reverse with be on one post and forward will be on the other
 
OnTheJob

OnTheJob

Well-Known Member
Dec 29, 2017
426
925
93
Bristol, NY
Ownership

  1. 1000-3
1. solenoid is not protection from burning up wires, you need a fuse or breaker at the battery. it is a switch that allows low current control of the high current motor, like dash switch and remote to control the high current motor. also controls the motor polarity for reverse with be on one post and forward will be on the other

Yes you are correct, it prevents the winch from always having power to it and it has nothing to do with burning wires up. It's my understanding it is not required to have a fuse or breaker at the battery for the winch, either before or after the contactor solenoid. Every wiring diagram or instructions for a winch installation, from various companies, I have never seen them mention or show a fuse or breaker in their wiring diagram.

As an example, is there a fuse or breaker between the battery and your starter? My personal option, if it is a short clean run for the wires, they should be safe, just as it is in a motor vehicle. Make sure all your connections are secure and nothing can pinch or chafe one of the wires. I would consider a breaker if I was running the winch off a yellow top battery under the driver's seat because that is a long run and the wire could sustain damage you may not be aware of. What size breaker I don't know because my Viper winch could draw up to 313 amps.
 
OnTheJob

OnTheJob

Well-Known Member
Dec 29, 2017
426
925
93
Bristol, NY
Ownership

  1. 1000-3
C25B71AF 7FED 4848 AD8E 03EAF17DBB9E
Replaced Stinger Solenoid:

My Stinger must have gotten some moisture inside of it because it was freezing up when it got down below 23 degrees.
https://www.amazon.com/Stinger-SGP38-80-AMP-Battery-Isolator/dp/B001HC6UJ0/?tag=sxsweb24-20

I don't go in water more than a few inches so that's only thing I can think of. Here is the thread on it if you want to read more about it:
P1000 - Stinger Relay Frozen

I also did an Amazon review on it. Click "helpful" to make it a top critical review:
It FROZE in cold weather - would NOT work

I decided to go with a heavier duty "marine rated" Cole Hersee solenoid, $28.43
https://www.amazon.com/gp/product/B001Q8KONI/?tag=sxsweb24-20

The label says it is 65 amp continuous duty, Intermittent rating 750A, 100A break 10 sec On, 30 min Off. It has a rubber coating much like Plasti-dip. It definitely feels heavy and built better than the Stinger. It was also bigger than the Stinger so I had to lengthen the wires for it's new location. Everything was very straight forward and mounted up really easy. Make sure you mount it feet down because there is fluid inside that cools the operation. Works perfectly. I added up my circuits and magically they equalled to 65 amps.
 
Last edited:
Chriscoe

Chriscoe

Active Member
Jun 4, 2018
83
131
33
Seagrove, NC
Ownership

  1. 1000-5
All of the heavy duty wiring is 6 gauge and the wiring I used for the switches is 16 gauge. View attachment 64046

The battery is sealed so it fit nicely on it's side in the box to the rear. I opted to have the terminals face towards the read so I could get to them more easily. The battery isolator location is pretty much the same spot most have put theirs. Next I wired in a ground terminal bussbar by routing a single 6 gauge black wire to the engine grounding point that the main battery uses.

View attachment 64047
I did this so I didn't have to overload the negative battery terminal with connections and it comes out much neater and easier to ground anything that has something to do with the Aux Batt side. All the connections heat shrink wraps on them and all the wire is copper strand, same stuff I would use on a boat or marine grade. Then the positive side goes to the 100 amp breaker which can also be used to manually shut off the Aux side. From there it goes to the Stinger relay switch which turns the Aux side on from a dash switch. Finally the fuse box which gets grounded back to the grounding point and the main battery. This was the EASY part of the Aux Batt install.

The switch is an ON-OFF-ON: Rocker switch 589B2 12V MAIN AUX on off on blue ATV UTV RTV DPDT | eBay
Positaps: https://www.amazon.com/gp/product/B01EINQXEG/?tag=sxsweb24-20
Wiring: https://www.amazon.com/gp/product/B000NV0G0U/?tag=sxsweb24-20
2 voltmeters: https://www.amazon.com/gp/product/B078M2RCDT/?tag=sxsweb24-20
Switch plate: Car Boat 3 Way Aluminum Rocker Switch Panel Housing Holder FOR ARB Carling Narva | eBay


View attachment 64052

So the way I wired this switch:
Center position the Aux side is off whether the key is on or not.
Switch up the Aux side is powered on when key is on, still only uses power from the Aux Batt
Switch down the Aux side is powered on whether the key is on or not.


The key on power came from the white wire with a black stripe from the fuse box, 15 amp, ACC, 5th one down. P1000 - Key On Power, Illumination, and backup source! - Honda Pioneer 1000
There are two of them and I don't think it makes a different which one. I used Positap which is a really great way to tap into a line, highly recommended. That went to one end of the switch. The Aux side power came directly from the 100 amp breaker. The center pin of the switch then goes to the Stinger small screws, doesn't matter which side, and then to the grounding bar. I Positap-ed each of the voltmeters into the key on source and Aux source. One of the voltmeters I got was defective and had to send it back.

Someone asked for a diagram for the wiring of the switch and voltmeters so here is a quick sketch. Not shown is the isolator.
See top right for disclaimer.
View attachment 64524

Wired mine up just like this but both top and bottom turn accessories on wether or not the machine is on or off


Sent from my iPhone using Tapatalk
 
J

Jim0311

New Member
Sep 25, 2018
3
4
3
North East, Pa
Ownership

  1. 1000-3
View attachment 104647 Replaced Stinger Solenoid:

My Stinger must have gotten some moisture inside of it because it was freezing up when it got down below 23 degrees.
https://www.amazon.com/Stinger-SGP38-80-AMP-Battery-Isolator/dp/B001HC6UJ0/?tag=sxsweb24-20

I don't go in water more than a few inches so that's only thing I can think of. Here is the thread on it if you want to read more about it:
P1000 - Stinger Relay Frozen

I also did an Amazon review on it. Click "helpful" to make it a top critical review:
It FROZE in cold weather - would NOT work

I decided to go with a heavier duty "marine rated" Cole Hersee solenoid, $28.43
https://www.amazon.com/gp/product/B001Q8KONI/?tag=sxsweb24-20

The label says it is 65 amp continuous duty, Intermittent rating 750A, 100A break 10 sec On, 30 min Off. It has a rubber coating much like Plasti-dip. It definitely feels heavy and built better than the Stinger. It was also bigger than the Stinger so I had to lengthen the wires for it's new location. Everything was very straight forward and mounted up really easy. Make sure you mount it feet down because there is fluid inside that cools the operation. Works perfectly. I added up my circuits and magically they equalled to 65 amps.


Very Helpful Postings! I keep referring back to all the info you have posted for my build!! Thank you!
 
  • Like
Reactions: OnTheJob
RedFred1

RedFred1

Well-Known Member
Aug 4, 2018
301
619
93
North Carolina
Ownership

  1. 1000-3
Yes you are correct, it prevents the winch from always having power to it and it has nothing to do with burning wires up. It's my understanding it is not required to have a fuse or breaker at the battery for the winch, either before or after the contactor solenoid. Every wiring diagram or instructions for a winch installation, from various companies, I have never seen them mention or show a fuse or breaker in their wiring diagram.

Exactly... the instantaneous current draw will likely trip any breaker or blow any fuse you would put in between the battery and your winch... a better way to say what you mean is using the cole hersee solenoid allows you to apply or disconnect the control side winch power to the winch relay circuit and other devices. The main winch power is always on to the winch control relay directly from the battery.

FredD
 
advertisement

Similar threads

About us

  • Our community has been around for many years and pride ourselves on offering unbiased, critical discussion among people of all different backgrounds. We are working every day to make sure our community is one of the best.

User Menu

Buy us a beer!

  • Lots of time and money has gone into making sure the community is running the best software, best designs, and all the other bells and whistles. Care to buy us a beer? We'd really appreciate it!

    Beer Fund!

    Club Membership!