When I was at my dealer first getting prices on the Pioneers the guy I was talking to said one of the first ones he sold came back in for its first service and the guy had put 29.5 OL2s on it and didn't say anything about rubbing, he did say the machine turned them really good in some sticky mud29.5 I should have put that on there the first time
You are using an out of date browser. It may not display this or other websites correctly.
You should upgrade or use an alternative browser.
You should upgrade or use an alternative browser.
-
 20151222_213210.jpg1.9 MB · Views: 868
 -
 20151223_003447.jpg6.3 MB · Views: 691
 -
 20160106_213906.jpg5.7 MB · Views: 531
 -
 20160106_214218.jpg6.2 MB · Views: 551
 -
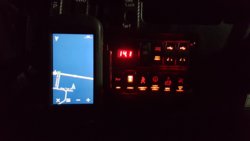 20160108_221047.jpg4.4 MB · Views: 820
 -
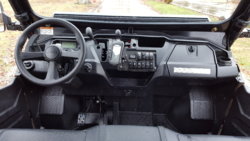 20160109_142007.jpg6.1 MB · Views: 646
 -
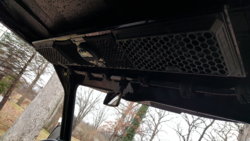 20160109_142035.jpg5.6 MB · Views: 560
 -
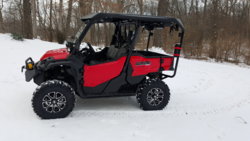 20160122_094311.jpg4.7 MB · Views: 817
 -
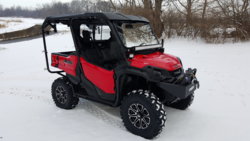 20160122_094325.jpg4.4 MB · Views: 821
 -
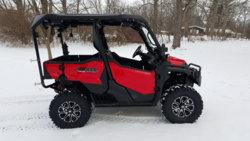 20160122_094335.jpg5 MB · Views: 867
 -
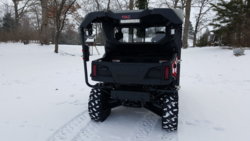 20160122_094354.jpg4.2 MB · Views: 846
 -
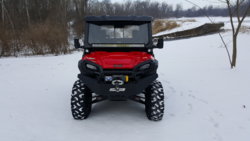 20160122_094414.jpg4 MB · Views: 1,149
 -
 20160122_094438.jpg3.3 MB · Views: 1,161
JACKAL
Ancient Honda fanboi
Moderator
Lifetime Member
Supporting Member
Club Contributor
I am just giving my honest experience with the larger tires even with the lift there are conditions where they rub and a quick spin around the driveway or lot doesn't reveal that. When turning sharp to the left and having the suspension compress with bumps, off camber, etc. the tires hit noticeably. Also at 40 mph plus they rub with even modest bumps in a straight line. So when asked about my opinion I will err on the side of caution since it is not my money they will be spending. If a person can make it work to thier satisfaction thats great, but for me if a tire doesn't clear under all conditions it doesn't fit properly.
Last edited:
I am just giving my honest experience with the larger tires even with the lift there are conditions where they rub and a quick spin around the driveway or lot doesn't reveal that. When turning sharp to the left and having the suspension compress with bumps, off camber, etc. the tires hit noticeably. Also at 40 mph plus they rub with ecen modest bumps in a straight line. So when asked about my opinion I will err on the side of caution since it is my money they will be spending. If a person can make it work to thier satisfaction thats great, but for me if a tire doesn't clear under all conditions it doesn't fit properly.
I'll second this. Jackal tried to warn me about 30's not fitting with the strongmade, but I figured I could make it work. I was wrong, I haven't hardly drove mine since because I have to have forward a-arms before I can justify taking it trail riding. Some say that 30's fit, but I can assure you those people haven't measured the actual height of their tires. Mine are exactly 30.0," most run up to an inch smaller.
I think you are exactly right. Mabye the hilifter would give the clearance a guy needs.Then get forward arched arms from them when they come out if still a bit of an issue or drop down to 29.5.I'll second this. Jackal tried to warn me about 30's not fitting with the strongmade, but I figured I could make it work. I was wrong, I haven't hardly drove mine since because I have to have forward a-arms before I can justify taking it trail riding. Some say that 30's fit, but I can assure you those people haven't measured the actual height of their tires. Mine are exactly 30.0," most run up to an inch smaller.
JACKAL
Ancient Honda fanboi
Moderator
Lifetime Member
Supporting Member
Club Contributor
I think you are exactly right. Mabye the hilifter would give the clearance a guy needs.Then get forward arched arms from them when they come out if still a bit of an issue or drop down to 29.5.
All you need is the forward A-arms any lift is OK, but the A-arms if worth their $$$ will have 2-3" lift built in by relocating the lower tabs. You can check out @joeymt33 thread on his CATVOS install it gave him the clearance he needed to run the exact same tires I couldn't. But with those bigger heavier tires he lost 7MPH off top end (GPS corrected speed top out @ 59 mph vs. 66 OEM).
I may try Off Road Beast forward A-arms they do not have them listed on website yet but should be ready anytime. Just pondering if I really want to go that route as I am tickled pink with the ride and handling as is not to mention even the ground clearance is very good.
I always like to ride my new machines stock for a couple months to see how I like the ride. Then I can better get an idea of the parts I need to focus on. Just an opinionWell I'm close to getting my Honda just can't decide if go with some 28 inch tires or bite the bullet and get the a arms ordered up. I would probably just get the fronts if that's what hilifter offers with their bracket lift. I'd like to run 30s but I know better too.
JACKAL
Ancient Honda fanboi
Moderator
Lifetime Member
Supporting Member
Club Contributor
Well my 28x10x14 Roctanes arrived a few days ago just got a chance to mount them up and give it a test spin. I experienced none of the issues I did with the 30" Roctanes and collectively the 28" size is 44 pounds less to rotate so that probably has a considerable amount to do with my prior concerns and observations. With the 30's the P1000 would not go over 50 mph in H range and seemed to cut out as if hitting a rev limiter, did the same at 30 mph in L range. With these 28" it tops out at 60MPH by the Honda digital speedo and 62.3 mph by GPS cruising smooth at can be, in L it hits 34 MPH / 35 MPH GPS reading and cuts out just like it does with OEM tires (factory electronic limited).
It isn't cleaned up for show n shine, been busy changing out all the fluids for initial service.


It isn't cleaned up for show n shine, been busy changing out all the fluids for initial service.
PioneerPete
Well-Known Member
Lifetime Member
Jackal did you notice any changes in camber after you installed your lift? I've seen some folks running 28x9 on the front and no lift with no issues... I wonder if the 28x10 would run with no lift without rubbing...
JACKAL
Ancient Honda fanboi
Moderator
Lifetime Member
Supporting Member
Club Contributor
Jackal did you notice any changes in camber after you installed your lift? I've seen some folks running 28x9 on the front and no lift with no issues... I wonder if the 28x10 would run with no lift without rubbing...
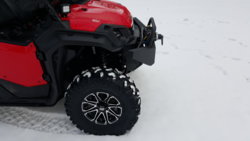
No these 28" will not fit / clear properly without a lift they are a touch bigger than 28" and will grow a bit with riding to nearly 29" when heated up. I did not notice any camber changes with my strong made lift, everything looks squared away. Here is pics with OEM tires, then 30 " tires and finally 28" tires all with that lift from the front/rear, Notice the tire/wheels all look perfectly vertical. Can't say so much for my photography skills.
OEM Tires with Lift
30" Roctanes with Strong Made Lift Front / Rear:
And current setup 28: Roctanes with Strong Made Lift Front / Rear:
advertisement
I have been going back and forth back and forth back and forth through your build pics and I can't for the life of me figure out what the heat-gun mod was to the air intake for the fuse controller. Please clarify if possible. One other thing, the battery Iso, it seems like a whole lot more wiring showed up after that. Sorry for being inept about it, just trying to figure it out before I get started with choosing a full 2 battery system. Thank you for all the remarkable detail so far.Well my Battery Isolator came in along with my remaining switches and 139db air horn
Got everything under hood wired up and set like I wanted. Ran out of time to run wire to lights and switches thanks to honey do jobs. amazing when you are off the things they can dream up for you to do like I don't have MY priorities
So here is the before and after of under to hood:
View attachment 8517
View attachment 8518
JACKAL
Ancient Honda fanboi
Moderator
Lifetime Member
Supporting Member
Club Contributor
With the mod on the air intake pre filter cover, I mounted a cooper busman power distribution module in there. I go into it and the wiring considerable in posts 30 through 42 or so, Maybe you skipped past it as the post you quoted is around number 45 but I showed pictures step by step cutting and fitting the PDM into the pre-filter cover and stuffing the module in there. A heat gun wasn't used, just a dremel tool. That's where all the wires came from.I have been going back and forth back and forth back and forth through your build pics and I can't for the life of me figure out what the heat-gun mod was to the air intake for the fuse controller. Please clarify if possible. One other thing, the battery Iso, it seems like a whole lot more wiring showed up after that. Sorry for being inept about it, just trying to figure it out before I get started with choosing a full 2 battery system. Thank you for all the remarkable detail so far.
I have read many of your posts in detail. I am currently very interested in your dual battery/accessory switch install. That's how I came upon the discrepancy in the pics. The first set was very clear (and smart) but when you get to the later pics (where you mention the heat gun) power controller sits differently and the cover appears melted at the edges. I wouldn't have thought of it if you hadn't mentioned the heat gun with that pic. Just trying to clarify because I really admire the installation and I'm eager to replicate it.With the mod on the air intake pre filter cover, I mounted a cooper busman power distribution module in there. I go into it and the wiring considerable in posts 30 through 42 or so, Maybe you haven't read that far but I even showed pictures cutting out the pre-filter cover and stuffing the module in there. A heat gun wasn't used, just a dremel tool.
JACKAL
Ancient Honda fanboi
Moderator
Lifetime Member
Supporting Member
Club Contributor
I have read many of your posts in detail. I am currently very interested in your dual battery/accessory switch install. That's how I came upon the discrepancy in the pics. The first set was very clear (and smart) but when you get to the later pics (where you mention the heat gun) power controller sits differently and the cover appears melted at the edges. I wouldn't have thought of it if you hadn't mentioned the heat gun with that pic. Just trying to clarify because I really admire the installation and I'm eager to replicate it.
Ok I understand now it wasn't until after I got everything wired up I went to put the hood back on only to realize the cover for the PDM stuck up a half inch too high on the front outer corner so I cut a wedge shaped slice out folding the top flap down at an angle I had some black gorilla tape I used to hold everything in place while the edge was hot. It sealed up so well i never took the tape off.
The pre filter cover is only $7 so I bought another one I am thinking of relocating the PDM and battery isolator further back to the top of the Odyssey battery. I just haven't gotten around to it yet. It works the way i did it but makes it a PITA to pop off that cover with 20 wires attached to it.
Thank you for the response. Do you think you could get a more detailed pic of the way it turned out or is it a moot point due to the relocation plans? Either way I'm curious how it turns out.Ok I understand now it wasn't until after I got everything wired up I went to put the hood back on only to realize the cover for the PDM stuck up a half inch too high on the front outer corner so I cut a wedge shaped slice out folding the top flap down at an angle I had some black gorilla tape I used to hold everything in place while the edge was hot. It sealed up so well i never took the tape off.
The pre filter cover is only $7 so I bought another one I am thinking of relocating the PDM and battery isolator further back to the top of the Odyssey battery. I just haven't gotten around to it yet. It works the way i did it but makes it a PITA to pop off that cover with 20 wires attached to it.
JACKAL
Ancient Honda fanboi
Moderator
Lifetime Member
Supporting Member
Club Contributor
Right now what you see in the pics is what you get there is no more details to show. How things get wired is entirely how you are going to use it.Thank you for the response. Do you think you could get a more detailed pic of the way it turned out or is it a moot point due to the relocation plans? Either way I'm curious how it turns out.
JACKAL
Ancient Honda fanboi
Moderator
Lifetime Member
Supporting Member
Club Contributor
OK I relocated the PDM and replaced the air intake cover with a new one. The below three pictures in order reflect, completely stock, PDM attached / imbedded into air intake cover / PDM moved to back and center affixed to metal support hoop.Thank you for the response. Do you think you could get a more detailed pic of the way it turned out or is it a moot point due to the relocation plans? Either way I'm curious how it turns out.
STOCK
PDM embedded in the intake cover
PDM moved back with new intake cover
This took me only about 15 minutes to move everything as I left my initial wiring loose enough to have room to move things around.
You are awesome. Thank you. I'm guessing from the pics you hadn't settled the battery Iso yet. There's something in the second pic that gets covered by the PDU in the third pic. Looks battery related judging by the cable size, what's that?OK I relocated the PDM and replaced the air intake cover with a new one. The below three pictures in order reflect, completely stock, PDM attached / imbedded into air intake cover / PDM moved to back and center affixed to metal support hoop.
STOCK
View attachment 11511
PDM embedded in the intake cover
View attachment 11512
PDM moved back with new intake cover
View attachment 11513
This took me only about 15 minutes to move everything as I left my initial wiring loose enough to have room to move things around.
JACKAL
Ancient Honda fanboi
Moderator
Lifetime Member
Supporting Member
Club Contributor
It's the fusible link from the battery to the 200 amp relay for the winch.You are awesome. Thank you. I'm guessing from the pics you hadn't settled the battery Iso yet. There's something in the second pic that gets covered by the PDU in the third pic. Looks battery related judging by the cable size, what's that?
can u take your front windshield out with the front pods mounted there or would u have to remove them to take out windshield? thanksGot my temporary dash plate all setup with GPS and took it for a test run to make sure everything held tight. Happy with it for being a temp solution until final rockers gangs arrive.
View attachment 8570
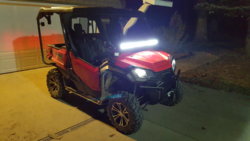
Front view with Sasquatch lights on
View attachment 8571
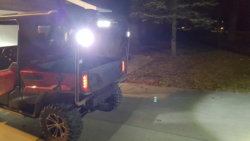
Rear view with Zombie Lights on
View attachment 8572
advertisement
Similar threads
- Replies
- 0
- Views
- 471

