

yeah center looks good but sides don't!! but when I look at it they all look like they are lit up bright!!!Something is wrong!! Email seller right away that's not right. One hell of a spot beam
You are using an out of date browser. It may not display this or other websites correctly.
You should upgrade or use an alternative browser.
You should upgrade or use an alternative browser.
-
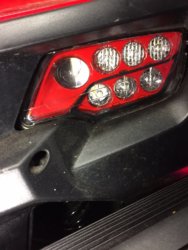 image.jpeg140.8 KB · Views: 630
 -
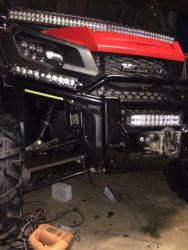 image.jpeg115.1 KB · Views: 584
 -
 image.jpeg38.1 KB · Views: 593
 -
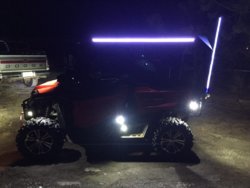 image.jpeg96.3 KB · Views: 597
 -
 image.jpeg102.4 KB · Views: 594
 -
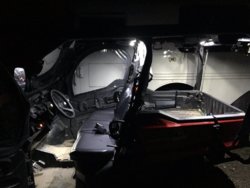 image.jpeg95.1 KB · Views: 601
 -
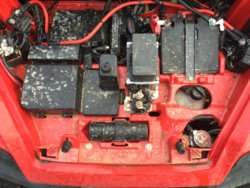 image.jpeg172.8 KB · Views: 605
 -
 image.jpeg59.8 KB · Views: 598
 -
 image.jpeg42.8 KB · Views: 572
 -
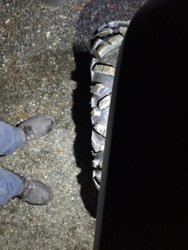 image.jpeg142.6 KB · Views: 577
 -
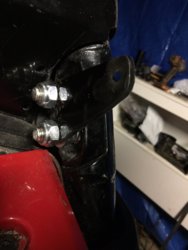 image.jpeg82.8 KB · Views: 531
 -
 image.jpeg94.7 KB · Views: 568
 -
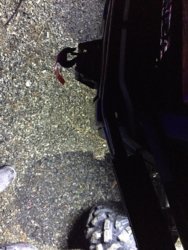 image.jpeg187.7 KB · Views: 574
 -
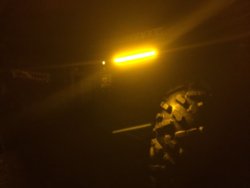 image.jpeg47.8 KB · Views: 579
 -
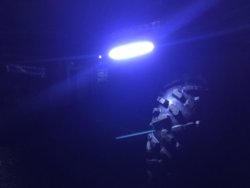 image.jpeg51.9 KB · Views: 546
 -
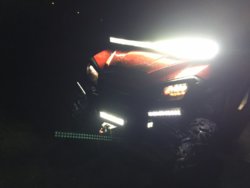 image.jpeg47.4 KB · Views: 561
 -
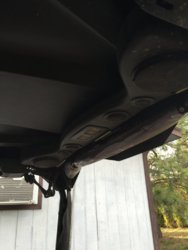 image.jpeg83.3 KB · Views: 572
 -
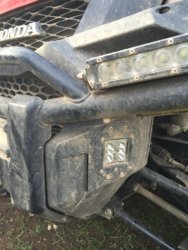 image.jpeg159.6 KB · Views: 549
 -
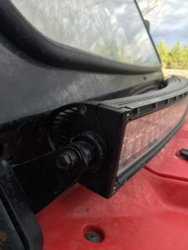 image.jpeg87.5 KB · Views: 547
 -
 image.jpeg123.1 KB · Views: 542
 -
 image.jpeg126.4 KB · Views: 1,022
 -
 image.jpeg123.1 KB · Views: 1,017
 -
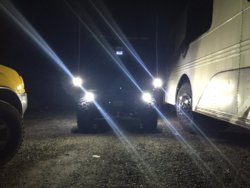 image.jpeg123 KB · Views: 1,172
 -
 image.jpeg95.1 KB · Views: 999
 -
 image.jpeg47.8 KB · Views: 1,030
 -
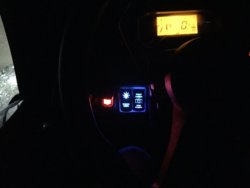 image.jpeg42.8 KB · Views: 1,014
 -
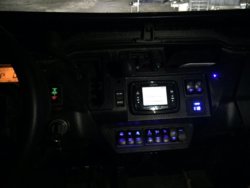 image.jpeg59.8 KB · Views: 995
 -
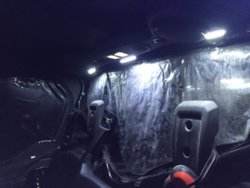 image.jpeg102.4 KB · Views: 502
 -
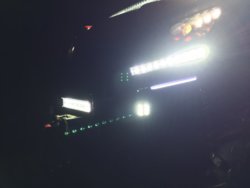 image.jpeg38.1 KB · Views: 964
 -
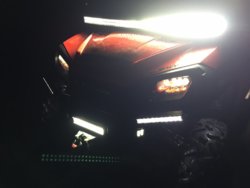 image.jpeg49.6 KB · Views: 510
 -
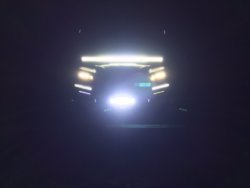 image.jpeg29.7 KB · Views: 993
 -
 image.jpeg142.6 KB · Views: 961
 -
 image.jpeg140.8 KB · Views: 973
 -
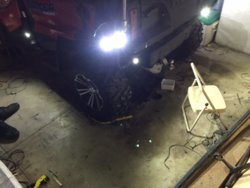 image.jpeg94.7 KB · Views: 554
 -
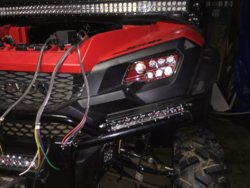 image.jpeg112.1 KB · Views: 473
 -
 image.jpeg62.2 KB · Views: 974
maybe u can shine yours on a garage sometime and post a pic. I got screwed cause got them off ebay and took them out of the box tested them in the daylight and threw away the boxes etc Just my luck
actually now that I'm thinking about it the orange plug that comes with it was messed up to begin with I had to mess with the wires to get it to light up maybe just the center is lighting up and making it look like the sides are lit?
CumminsPusher
Just a Honda doing Honda things.
Lifetime Member
Supporting Member
Club Contributor
That comparison was done with the original fisheye optics with only the 5watt bulbs.the new setup is way way better and 7watt.
Last edited:
CumminsPusher
Just a Honda doing Honda things.
Lifetime Member
Supporting Member
Club Contributor
We leave the vehicles loaded after camping so we're ready to go the next week so it would be a bit till I could shine it on door but here's a photo of the light on at 3feet from the quad. You can tell it's already spreading very good. The center is brighter because of the 30degrees but it lights up the sides very well. That light works so well we use it all the timeactually now that I'm thinking about it the orange plug that comes with it was messed up to begin with I had to mess with the wires to get it to light up maybe just the center is lighting up and making it look like the sides are lit?
Which back up camera did you use?
It maybe listed in your OP, but I
didn't see it.
Nice job.
John
It maybe listed in your OP, but I
didn't see it.
Nice job.
John
Eltobgi
Well-Known Member
Lifetime Member
Supporting Member
Club Contributor
CumminsPusher, could you post a photo of your whip mounts? I'm trying to decide on a future location for mine, and way to mount.
I just ordered a set today Xkchrome Led Whips with additional pods. Not re if mounts included.
Impressive work with the lighting! yours is by far the most impressive and extensive example of lights done right")
I just ordered a set today Xkchrome Led Whips with additional pods. Not re if mounts included.
Impressive work with the lighting! yours is by far the most impressive and extensive example of lights done right
CumminsPusher
Just a Honda doing Honda things.
Lifetime Member
Supporting Member
Club Contributor
 Thank you very much!This is the basic setup pretty reasonable u would suggest this and use the license plate as mounting point to see where you would like it. The roof is the best spot but depends if you're going to ever pull it. If you already have a mirror the monitor can mount that way but for a very solid mount get a roll bar clamp from Honda and mount directly to that. There are better cameras but this one is ok and you wouldn't be doing any damage to the machine until you were absolutely sure this is what you wanted and of your personal placement
Which back up camera did you use?
It maybe listed in your OP, but I
didn't see it.
Nice job.
John
advertisement
CumminsPusher
Just a Honda doing Honda things.
Lifetime Member
Supporting Member
Club Contributor
We really appreciate the comments. It took months of planning and weeks of hard execution but it's done and will lastCumminsPusher, could you post a photo of your whip mounts? I'm trying to decide on a future location for mine, and way to mount.
I just ordered a set today Xkchrome Led Whips with additional pods. Not re if mounts included.
Impressive work with the lighting! yours is by far the most impressive and extensive example of lights done right
here's a picture of the mount. I apologize for the dark picture and dirty machine but it's loaded and ready to hit the dirt tomorrow for the weekend. One of the backup lights is just below that's what the black oval box is. The mount is very solid and the Gorilla whips take one hell of a beatin we didn't have as good a mounting bracket before as they were on our 700 prior and we try to tear them off every weekend. If you're in brush really heavy you'll want to mount them down a bit and we bolted a piece of rubber onto the roof where the hit because on the last rig the made a hell of a racket after hitting trees and brush. Good luck with them whips are a lot of fun and set you apart a little
Last edited:
Is there a better one you can recommend?
I want to install one, but I have no
experience with them. $36 is affordable,
but I would pay more for a good quality
one.
Thanks!
John
I want to install one, but I have no
experience with them. $36 is affordable,
but I would pay more for a good quality
one.
Thanks!
John
View attachment 13211 Thank you very much!This is the basic setup pretty reasonable u would suggest this and use the license plate as mounting point to see where you would like it. The roof is the best spot but depends if you're going to ever pull it. If you already have a mirror the monitor can mount that way but for a very solid mount get a roll bar clamp from Honda and mount directly to that. There are better cameras but this one is ok and you wouldn't be doing any damage to the machine until you were absolutely sure this is what you wanted and of your personal placement
CumminsPusher
Just a Honda doing Honda things.
Lifetime Member
Supporting Member
Club Contributor
That monitor has been money for us all I did was take it apart pull the factory mounts off of it mount the Honda clip and sealed it up real good with black silicone I pressure wash the inside of the machine With no problems I tried not to hit it but it still got wet so far so good the only thing I would suggest is a better rearview camera where would you be mounting it? I would suggest a flush mount in the roof aimed down but the depends on roof and if you planned on taking the roof off. The camera does unplug though. You could even mount one roof and one under bed for certain things pretty easy actually which ever camera gets power feeds the monitor you just connect both rca together and feed power. We have the 5 so roof is definitely better ours is just under the roof higher gets less dust up high you really never have to clean it down lower it does need cleaned more but not near as often as you would think. And also measure the space between your roof and the rear rollbar to see how much room you have behind itIs there a better one you can recommend?
I want to install one, but I have no
experience with them. $36 is affordable,
but I would pay more for a good quality
one.
Thanks!
John
Last edited:
We have a P1k3, so I will need to
mount the camera on or under the
bed. I have seen where some have
mounted them in the tailgate, but
that complicates getting the power
wires out of it & where they need to
go. I just looked & maybe I can mount
it right above one of the tail lights,
but I'll see when I get it.
Thanks for the input.
John
That monitor has been money for us all I did was take it apart pull the factory mounts off of it mount the Honda clip and sealed it up real good with black silicone I pressure wash the inside of the machine With no problems I tried not to hit it but it still got wet so far so good the only thing I would suggest is a better rearview camera where would you be mounting it? I would suggest a flush mount in the roof aimed down but the depends on roof and if you planned on taking the roof off. The camera does unplug though. You could even mount one roof and one under bed for certain things pretty easy actually which ever camera gets power feeds the monitor you just connect both rca together and feed power. We have the 5 so roof is definitely better ours is just under the roof higher gets less dust up high you really never have to clean it down lower it does need cleaned more but not near as often as you would think. And also measure the space between your roof and the rear rollbar to see how much room you have behind it
CumminsPusher
Just a Honda doing Honda things.
Lifetime Member
Supporting Member
Club Contributor


No problem however I don't feel like I gave you much to go off of. If you come across anything or need any ideas bounced around feel free I really do like doing this stuff. I've got a feeling one of these would suit your needs. Well good luck with the build and if you'd keep me informed on how well you like it if you would I'm curious how someone else feels about it.We have a P1k3, so I will need to
mount the camera on or under the
bed. I have seen where some have
mounted them in the tailgate, but
that complicates getting the power
wires out of it & where they need to
go. I just looked & maybe I can mount
it right above one of the tail lights,
but I'll see when I get it.
Thanks for the input.
John
CumminsPusher
Just a Honda doing Honda things.
Lifetime Member
Supporting Member
Club Contributor
Here are pics of the SSV Works speaker box from the 700 installed into the 1000 probably first true bass box in a 1000 because no one builds it yet so I guess I had to. It took quite a bit of work had to cut it in half to reinforce it as it was starting to crack out in just 9 months in the 700 not impressed but whatever fiberglass work is easy. Had to change shape and build custom brackets for the 1000 and installed all new nutserts so it could be mounted and pulled out quickly. It comes out in 5 minutes that's way better then the 700 that it was designed for. I had already took the junk "upgrade" speaker out (watt rating was a joke! Not rms!) to install the Infinity because it wasn't getting the job done and clarity was horrible! "If" I run SSV Works again I'll order it unloaded without speakers and install good speakers that hold up and save some coin. I then mounted it up close enough to the inside of the cabin to port it directly inside for a way better sound (yes that's a powder coated shower drain cover I searched and that '9724my needs the best). I put a 90deg up-spout internally so you can go through water darn near to seat bottom. I also Installed red led lighting into the port tube so it has an evil glow at night. We have a plug that goes in for lake crossings if needed so it's totally sealed up then. It's as solid as anything else on this rig totally overkill
This all works well with the Infinity prv-350-1 because it has subwoofer controlling right from the deck and separate subwoofer outputs. It's a damn nice deck. All in all I'm sure this is one of the clearest loudest sxs's out there. Now powered by an 800 watt Rockford Fosgate amp and with the port on the inside it'll damn near rattle the beer from the holder.
Last edited:
Eltobgi
Well-Known Member
Lifetime Member
Supporting Member
Club Contributor
Nice Work! Where is Amp Mounted?View attachment 13633 View attachment 13634 View attachment 13635 View attachment 13636 View attachment 13637
Here are pics of the SSV Works speaker box from the 700 installed into the 1000 probably first true bass box in a 1000 because no one builds it yet so I guess I had to. It took quite a bit of work had to cut it in half to reinforce it as it was starting to crack out in just 9 months in the 700 not impressed but whatever fiberglass work is easy. Had to change shape and build custom brackets for the 1000 and installed all new nutserts so it could be mounted and pulled out quickly. It comes out in 5 minutes that's way better then the 700 that it was designed for. I had already took the junk "upgrade" speaker out (watt rating was a joke! Not rms!) to install the Infinity because it wasn't getting the job done and clarity was horrible! "If" I run SSV Works again I'll order it unloaded without speakers and install good speakers that hold up and save some coin. I then mounted it up close enough to the inside of the cabin to port it directly inside for a way better sound (yes that's a powder coated shower drain cover I searched and that fit my needs the best). I put a 90deg up-spout internally so you can go through water darn near to seat bottom. I also Installed red led lighting into the port tube so it has an evil glow at night. We have a plug that goes in for lake crossings if needed so it's totally sealed up then. It's as solid as anything else on this rig totally overkill
CumminsPusher
Just a Honda doing Honda things.
Lifetime Member
Supporting Member
Club Contributor
In the box where it's totally protectedNice Work! Where is Amp Mounted?
Eltobgi
Well-Known Member
Lifetime Member
Supporting Member
Club Contributor
How about a photo of the mount. I'm considering locations for my installation and love photos. Thank you.In the box where it's totally protected
CumminsPusher
Just a Honda doing Honda things.
Lifetime Member
Supporting Member
Club Contributor
I don't have a photo of the amp mount but I simply drilled holes in the bottom of the box used small stainless bolts and mounted through rubber orings to stop vibration and to waterproof the holes.works like a champ and waterproofs your amp. We had this same basic setup in the 700 however without the port and we went through seat level water with tunes loud as hell(speaker sounds a little funny with water covering it thoughHow about a photo of the mount. I'm considering locations for my installation and love photos. Thank you.
) this setup can handle about 2 1/2 feet of water without the plug and totally submerged with. Everything is totally waterproof and pressure washer proof beyond belief. I don't like doing things twice. Fiberglass is the way to go here however wood that's very well protected will work to. This hits so much harder then those roof mount units and it's never in your way. This whole system cost me about the same as overhead setup (we had that in our last rzr and I hated how you always had to have a phone hooked up to it and no one seem to be able to work it well you couldn't really add anything to it except what they told you to I swore never again) but it's as expandable as car audio. I lose a little storage but for a lot of our riding we have service for the other parts I'll bring our tool bag behind the rear seats.
Last edited:
advertisement
Similar threads
H
- Replies
- 0
- Views
- 601
H