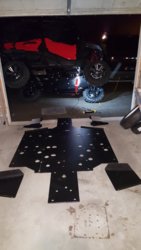
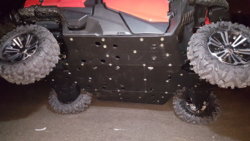
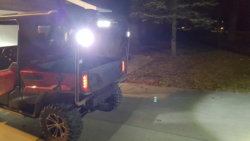
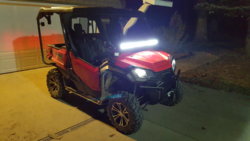
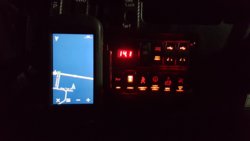
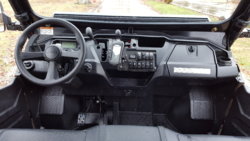
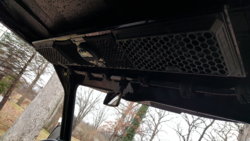
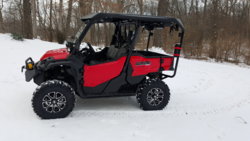
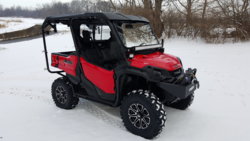
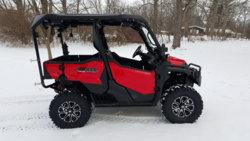
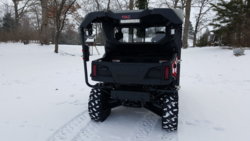
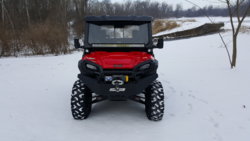
20160122_094255.jpg

P1000 Jackal's P1000-5

Samiam1286

Samiam1286

Member
Jul 24, 2016
56
29
18
Ohio
Ownership

  1. 1000-5
Haven't posted any updates in a while currently addressing in cab heat. Insulation installed the right way under the plastic and double layer between seat belts next to head and header pipes along with 4" bilge fan. Removal of seat back and plastic cover between seat bottom and back. Insulation BEFORE it heats up the plastic next to the occupants.
View attachment 19183
View attachment 19184

Will post as insulation is installed. Why is it so hot normally because only 2" gap and 1/8" of plastic separate engine from occupants. View attachment 19185
Where did you get the bilge blower? Make and model number?


Sent from my iPad using Tapatalk
 
  • Like
Reactions: Hallboy88
V

vitulla

New Member
Aug 1, 2016
11
3
3
Montreal, Quebec, Canada
Ownership

  1. Do not currently own
Wow, what an informative build thread, well done and very well explained. Thanks I will be coming back and doing a few things you have done. Would you happen to have any new pics of the gear rail with rotopax and spare tire?
Thanks again
Danny
 
  • Like
Reactions: pct and JACKAL
JACKAL

JACKAL

Ancient Honda fanboi
Moderator
Lifetime Member
Supporting Member
Club Contributor
Jun 11, 2015
39,810
271,883
113
Pioneer, TN
Ownership

  1. 1000-5

  2. Talon X4
I haven't finished that yet been too busy moving and building new house.
 
  • Like
Reactions: vitulla
BlueCollarGuy7007

BlueCollarGuy7007

Member
Mar 2, 2016
65
69
18
DFW Texas
I installed the ThrottleMaxx for the P500 / P700 on my P1K. Turns out I didn't have to modify it at all just enough room to bolt right on.
View attachment 19219

Took it out for a 30 minute ride wished I had it on from day one. You can literally rest you heel against the back plastic wall and run it up to full throttle with ease. Need more control just slide your foot up 2 inches and you can finesse the throttle through the roughest sections by keeping your heel firmly planted.

Definitely recommend this product.
Would this help eliminate or ease how touchy the throttle can be @ times? Did not take long & I can drive it smoothly even on rough but I do notice the 1st time any one else drives the machine they end up just short of a case of whip lash. Especially if short & can not rest their heel on the floor. If this will help would be interested in where to get one.
Thanks.
 
BlueCollarGuy7007

BlueCollarGuy7007

Member
Mar 2, 2016
65
69
18
DFW Texas
Like all on this thread have described the heat can be too much & if driven through deep water will almost have you bailing out to not be scolded - but in the winter months, yeah like that heat coming up behind the seat. Jackal has come up w/ what I see as the best full-time fix but want to ask those who like my self like having heat when they want it is the bilge fan a fix to allow the best of both worlds? Thanks.
 
JACKAL

JACKAL

Ancient Honda fanboi
Moderator
Lifetime Member
Supporting Member
Club Contributor
Jun 11, 2015
39,810
271,883
113
Pioneer, TN
Ownership

  1. 1000-5

  2. Talon X4
Would this help eliminate or ease how touchy the throttle can be @ times? Did not take long & I can drive it smoothly even on rough but I do notice the 1st time any one else drives the machine they end up just short of a case of whip lash. Especially if short & can not rest their heel on the floor. If this will help would be interested in where to get one.
Thanks.
Yes it helps.
 
JACKAL

JACKAL

Ancient Honda fanboi
Moderator
Lifetime Member
Supporting Member
Club Contributor
Jun 11, 2015
39,810
271,883
113
Pioneer, TN
Ownership

  1. 1000-5

  2. Talon X4
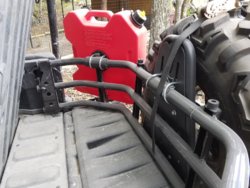
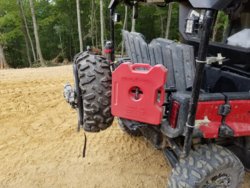
I decided to go ahead and try and alternative method of carrying a spare tire, jack, and fuel can by using the Honda bed extender accessory as a platform. The Kolpin bar just wasn't going to work out for me with anyone in back seats. The way I did it still leaves me room for a cooler, etc behind the back two seats.

Mounting, I used two, 2"x 5/16" x 4" Ubolts for the fuel mount and spare carrier with nylock nuts. To get things snug cut 1.25" plastic conduit sections to snap over bed extender tubing wrapping pieces in gorilla tape for grip and finish protection.
In addition to the Bed extender used the Quickshot verticle spare carrier with built-in jack. Got it from RMATV.COM here:
Pro Armor Quickshot Universal Tire and Accessory Vertical Mount | UTV | Rocky Mountain ATV/MC
I also went with the 3 gal rotopax and quick mount also from RMATV.COM.

I mounted everything up and went for a shakedown ride everything stayed put and held up to rough terrain just fine. If you,want full access the bed extender still quick releases with everything still mounted, heavy but it works for me. Here is what the finished product looks like. I will mount my chainsaw on the left opposite of the rotopax, tired of being turned around by downed trees.
20160813 141806 20160813 141754
20160813 151257
 
moparornocar

moparornocar

RIP....Rocmar...
Lifetime Member
Jan 26, 2016
4,606
12,493
113
Augusta, Wisconsin
Ownership

  1. 1000-5
Plans for the loop in mount? Got any pics of the new setup? I'm still working that out in mine as well
 
JACKAL

JACKAL

Ancient Honda fanboi
Moderator
Lifetime Member
Supporting Member
Club Contributor
Jun 11, 2015
39,810
271,883
113
Pioneer, TN
Ownership

  1. 1000-5

  2. Talon X4
Plans for the loop in mount? Got any pics of the new setup? I'm still working that out in mine as well
Patience my ISP is a tin can with yarn for fiber. See previous post.
 
  • Like
Reactions: moparornocar
advertisement
JACKAL

JACKAL

Ancient Honda fanboi
Moderator
Lifetime Member
Supporting Member
Club Contributor
Jun 11, 2015
39,810
271,883
113
Pioneer, TN
Ownership

  1. 1000-5

  2. Talon X4
Idk how i got loop in mount. I meant kolpin lol
OK I was wondering what you meant. I will use the Kolpin mounting plate, quick detachable mount and chainsaw boot bolted to the bed extender just like the rotopax is mounted, but on the angled drivers side.
 
  • Like
Reactions: moparornocar
JACKAL

JACKAL

Ancient Honda fanboi
Moderator
Lifetime Member
Supporting Member
Club Contributor
Jun 11, 2015
39,810
271,883
113
Pioneer, TN
Ownership

  1. 1000-5

  2. Talon X4
Wow, what an informative build thread, well done and very well explained. Thanks I will be coming back and doing a few things you have done. Would you happen to have any new pics of the gear rail with rotopax and spare tire?
Thanks again
Danny
@vitulla see my alternative method decided against Kolpin rail and used Honda bed extender for the mounting platform bottom of page 18 in this thread.
P1000 - Jackal's P1000-5
 
Last edited:
Revtech100

Revtech100

Active Member
Lifetime Member
Aug 5, 2016
100
137
43
Anchorage, AK
Ownership

  1. 1000-5
Ok so for the heatshield install I removed the seat bottom, seat back, and the plastic that spans the gap between the two.

All stripped down looks like this.
View attachment 19196

Fitted front and side edges leaving 2" material tucked down front and sides held by OEM push rivets. Trimmed back and passenger sides, left center full length to fold down in back to double thickness between engine and center seat.
View attachment 19197

All tucked in place.
View attachment 19198


Center plastic piece back in place.
View attachment 19199

Seat back in place.
View attachment 19200


Bottom back in all done.
View attachment 19201

To check sub transmission I cut out a 8"x8" flap then took a scrap piece 3" longer and wider glued to top of flap. Simply lift up to check oil level then let it rest on top seat holds firmly in place.

Material used was this:
ESP Low-E® EZ-Cool Car Insulation Kit(Includes 40 Sq. Ft Insulation, 10' Foil Tape): Heat and Sound Automotive Insulation For Your Car Restoration Projects - - Amazon.com

Enough for two machines for $33.

Thanks for the tutorial. Did mine today. Looks good.
 
  • Like
Reactions: JACKAL
Samiam1286

Samiam1286

Member
Jul 24, 2016
56
29
18
Ohio
Ownership

  1. 1000-5
Not sure this is totally related to this thread, but where is the best place to get a matching wheel/tire to use as spare? I like this setup a lot! Can the bed extender still be flipped up into the bed? I know it wouldn't flip all the way but looking for enough to close the tailgate, for room in the toy hauler


Sent from my iPad using Tapatalk
 
JACKAL

JACKAL

Ancient Honda fanboi
Moderator
Lifetime Member
Supporting Member
Club Contributor
Jun 11, 2015
39,810
271,883
113
Pioneer, TN
Ownership

  1. 1000-5

  2. Talon X4
Not sure this is totally related to this thread, but where is the best place to get a matching wheel/tire to use as spare? I like this setup a lot! Can the bed extender still be flipped up into the bed? I know it wouldn't flip all the way but looking for enough to close the tailgate, for room in the toy hauler


Sent from my iPad using Tapatalk
Yes you can flip it up enough with everything attached and close tailgate for transport. I prefer RMATV.COM for typical accessories, tires, wheels, etc. For Honda parts and accessories I use procaliber.com from there you can get an OEM machined matching wheel for around $100 or an aftermarket machined wheel for about $80 from RMATV.COM
 
Samiam1286

Samiam1286

Member
Jul 24, 2016
56
29
18
Ohio
Ownership

  1. 1000-5
I am planning on having a total of twelve rockers divided into two gangs of six per row of which two will be a double port 3.2 amp USB power port with red backlighting giving me (4) total powered USB ports for charging phones, GoPro, GPS, etc. the remaining 10 switches will perform the various electrical functions all through a Cooper Bussman power distribution module, this module has an 6 gauge main Positive power line & 8 gauge Negative grounding line both to the secondary Oddessey 925 Battery, then there is (5) output wires with 15 amp fuses without relays for running the minor stuff like pod lights, horn, etc. There is (5) 35 amp relay lines with 30 amp fuses for each line / relay with a 14 gauge wire to go to the switched power to close the relay and (5) 10 gauge wires coming out of the fused relay to power bigger accessories, Light bars, Stereo, etc.

Here is the power distribution module as received, all prewired and includes all necessary items like heat shrink and butt connectors, etc. View attachment 8435
Here is a detail of the top with cover off and underneath detail:
View attachment 8436 View attachment 8437

Looking under the hood for a place to mount this PDM there was not a location I liked with the metal standoff attached to the Bussman PDM so I removed the standoff then you have the prewired bundle coming from underneath so that negates a flush mount. Then the light went off that the large black cover that covers the air pre-cleaner and intake tube could house this PDM in a recessed cutout in a very tidy fashion.

OEM under the hood untouched, then black air intake cover removed:
View attachment 8438 View attachment 8441

Dropping in the 2nd battery, note the added L connectors on terminals:
View attachment 8439 View attachment 8440

Intended location for PDM once cover is on & PDM setting in place of hole to be cut out:
View attachment 8442 View attachment 8443
Roughed cutout in black cover for PDM insertion from underneath & 3/4" hole on side for all wiring to exit.
View attachment 8444 View attachment 8445

PDM screwed in place with wires pulled through & lid secured in place. All neat and tidy without using up any additional space under the hood.
View attachment 8446 View attachment 8447

I will seal around the PDM mounting holes with black RTV silicone and as shown you do not lose any space where you can mount anything else needed. The only other spot big enough (that suited me) with the PDM standoff attached is where I want to mount the Battery Isolator which I will not have until 12/30/15. As viewing the bottom right picture with the cap on the PDM it does interfere with the hood slightly and needs to come down 3/8 of an inch on the left side where the hood lies with the body. Thankfully there is 1" of clearance underneath the PDM cover so a little work with the heat gun will reshape this so it doesn't touch the hood when secured down.

Well time to start making a couple dozen Jumper wires for all my lighted switches, no rest for the wicked. :p

Do you have a part number for this PDM?


Sent from my iPhone using Tapatalk
 
advertisement

About us

  • Our community has been around for many years and pride ourselves on offering unbiased, critical discussion among people of all different backgrounds. We are working every day to make sure our community is one of the best.

User Menu

Buy us a beer!

  • Lots of time and money has gone into making sure the community is running the best software, best designs, and all the other bells and whistles. Care to buy us a beer? We'd really appreciate it!

    Beer Fund!

    Club Membership!