P1000 P1K5Dave's 1000-5 Build

P1K5Dave

P1K5Dave

Well-Known Member
Lifetime Member
Club Contributor
Jul 11, 2020
2,251
8,439
113
Petoskey, MI
Ownership

  1. 1000-5
Thanks! I'm quite happy with the Fox 2.0s, no regrets there. Although, if you're going to upgrade the springs all around, I think you start approaching Elka money anyway. Maybe down the road I might like to try a set, everything I've read here has been positive.

There's a link in the first post to my suspension build, where I went through the 814s before the Fox. Didn't care much for them.
 
  • Like
Reactions: Remington
S

Smooth Operator

Active Member
Apr 5, 2021
41
139
33
Usk, Wa
Ownership

  1. 1000-5
I'm going to keep a list of maintenance, fixes, and add-ons in this post. I do all the oil changes and such to schedule, so I won't bore you with those details. But I thought it might be interesting to others to see how often I need to change out wear parts like brake pads, for example. I use ACar by Fuelly on my Android phone to keep track of everything I do to all of my vehicles.

I called out the bigger problems with bold face and larger fonts. These are the "bad days." :oops:

  • 7/20, 2500 mi - replaced the battery with a new NAPA AGM. The battery that was in it when I purchased it was about shot.
  • 7/20, 2500 mi - Installed vent line kit, added rear recovery shackle, replace RR seat bottom.
  • 7/20, 2690 mi - pulled out my spark arrestor and cleaned it. Found that there was already one of the bolts broken off in the muffler, so I used anti-seize in the remaining two and put it back together.
  • 8/20, 2700 mi - replaced tail light that was burned out.
  • 8/20, 2800 mi - Installed Bad Dawg front bumper, Badlands 5K winch, dual battery system, switches.
  • 8/20, 2800 mi - Replaced air filter, did not need to be done as it was in good shape.
  • 8/20, 2800 mi - Replaced brake pads all around
  • 8/20, 2800 mi - Added RB3 Offroad wheel spacers
  • 8/20, 2800 mi - Added rubber to door bumpers, installed larger cup holders.
  • 8/20, 2800 mi - Installed 4-pt harnesses for rear seats
  • 8/20, 2894 mi - After having parts on backorder for over a month, replaced the R-1-3-5 Clutch Pack
  • 8/20, 2899 mi - Had front wheel bearing squeal. Purchased a bearing greaser and fixed that immediately. I now grease bearings on every brake job.
  • 8/20, 2900 mi - Replaced LF MSA wheel. Crack on inner wheel caused slow leak.
  • 8/20, 3100 mi - Added 15" front led light bar to top of Bad Dawg bull bar
  • 9/20, 4091 mi - 2+ months of backorder, finally got the parts in to do the reverse gear replacement (Talon gears) and low range gear replacement. I had driven the machine 1600 miles with no reverse. :D I wrote a thread on this job here.
  • 9/20, 4100 mi - replaced LR tail light. Both tail lights now new.
  • 9/20, 4100 mi - Added flip-down windshield
  • 9/20, 4100 mi - Added Mudbuster XL fender flares
  • 9/20, 4200 mi - Random shutdowns - Replaced both injector plug / wires. One of them was failing with increasing frequency.
  • 10/20, 4400 mi - Replaced LF brake line, broken and leaking
  • 11/20, 4855 mi - Trail damage (made it home) Replaced RF axle with an OEM axle, replaced diff seal at this time. (A few posts on this topic)
  • 11/20, 4925 mi - Trail breakdown (left overnight, fixed on trail next day) - Sheared RF upper ball joint. Replaced ball joint, replaced RF brake hose (damaged in failure,) replaced RF axle with a Rhino 2.0 because boot was torn on stock axle, ordered boot to repair stock axle as backup.
  • 11/20, 4925 mi - Replaced right tie rod kit. Inner joint was sloppy. Also replaced the plastic "bearing" inside the steering box joint.
  • 11/20, 5147 mi - Replaced all brake pads, lubed all wheel bearings.
  • 3/21, 5200 mi - Steering column knuckle replaced by dealer under recall
  • 4/21, 5549 mi - Front Right damage due to clipping log at 30 mph (left on trail overnight, towed out next day.) Weld repair torn upper tab, replace RF Highlifter arms (upper and lower) and Highlifter bushing kit. New OEM ball joints (upper and lower.) New tie rod kit and outer tie rod end, new brake line, swapped stock axle back in (Rhino 2.0 axle separated at outer CV, replaced by SATV under warranty - new Rhino 2.0 on hand as backup / awaiting purchase of second one to replace stockers.)
  • 4/21, 5803 mi - Replaced air filter. Second time I replaced this thing too early, it looked really good.
  • 5/21, 5943 mi - Changed out front and rear diff lube, went to full synthetic 75w-140
  • 5/21, 6100 mi - Added passenger grab handles to Right upper roll bar, removed rear sway bar, made the firewall "heat door" quick-detach, did the first storage mod to the RR bed panel.
  • 5/21, 6100 mi - Added RAD Customs rear seat bracket mod.
  • 5/21, 6400 mi - Added Tusk 3/8" UHMW full skid plate
  • 5/21, 6500 mi - Modified bed latches with 1/4" tubing to eliminate squeaks and rattles
  • 6/21, 6797 mi - Replaced all four rubber bumpers where bed sits on frame
  • 6/21, 7071 mi - Upgraded suspension to TTC 3" lift, 814 shocks
  • 6/21, 7071 mi - All new brake pads and rotors all around, lubed wheel bearings
  • 7/21, 7450 mi - Replaced 814 shocks with Fox QS3's
  • 7/21, 7600 mi - Busted the hell out of the left rearview mirror (Xprite, LED.) Right one was already cracked, so I ordered a new set.
  • 9/21 8400 mi - Broke LF axle. Replaced with Rhino 2.0. Replaced an upper ball joint (already) in my new suspension.
  • 9/21 8584 mi - Installed new single rate springs on rear Fox QS-3's (I wrote a how-to thread on this,) had a tire repair for a nail in the tread, and replaced rear brake pads.
  • 9/21 8700 mi - Broken Radiator Fan. Replaced with Spal aftermarket fan. See Fan Fail thread. Did a full coolant replace since I was in there.
  • 9/21 8700 mi - Cracks in TTC front upper a-arms. To be replaced with new. Pics in Lift Thread.
  • 10/21 8895 mi - replaced front right upper ball joint, front brakes, and greased front wheel bearings. Upgraded front shock springs to 250 lb single rate.
  • 11/21 9900 mi -added Vision-X light cannons
  • 12/21 9996 mi - put her in storage for the Winter, 4 miles shy of 10k
to be continued...
You keep great records.
 
  • Like
Reactions: P1K5Dave
TripleB

TripleB

Well-Known Member
Lifetime Member
Aug 13, 2018
15,506
139,239
113
Caryville, Tennessee
Ownership

  1. 1000-3

  2. 1000-5
About 30-45 minutes but you'll need a second set of hands to hold the nuts for the rack. I was pleasantly surprised how easy it was once the bolts were out. I took the little shield off the back of the front diff for extra room. Put a dab of red lock tite on the inner tie rod threads while you're in there
I wasted 5 hours of my life trying to do it by myself. I had to call for help and did in 5 minutes what I couldn't do in 5 hours trying to be a stubborn ass.
 
P1K5Dave

P1K5Dave

Well-Known Member
Lifetime Member
Club Contributor
Jul 11, 2020
2,251
8,439
113
Petoskey, MI
Ownership

  1. 1000-5
500-mile review on BF Goodrich Mud Terrain KM3's (30 x 10 x 14)

I've been running these tires for a little over a month now, so I thought I'd write a quick review on them. The only other tires I have run on this Pioneer was a set of Maxxis Liberties, also 30", that were on the machine when I bought it.

Overall, very pleased with these tires so far. They are well-behaved on the pavement (I have to run 4 miles of pavement to and from the trails) and they don't howl at all. They are not DOT tires - I'm not really sure why - but they're close in road behavior to the Liberties. They do weigh in at 41 lbs each vs. 34 lbs on my previous tires, but I can't really say I've noticed any difference in power.

I'm running them at 15 psi. I'm not near the machine at the moment, but I'll come back and put in a true height measurement at that pressure after this weekend.

Trail performance has been excellent, and while I'm not a big mudder, so far I have hit a few holes that I would have had trouble with before and I've been able to go through them without hammering on it.

I had heard that they throw rocks around a lot when driving gravel roads, but I haven't seen much of it. An occasional throw here and there, but what I'd expect from a MT tire.

I got the set of 4 for $969 with free shipping, and paid another $130 to get them mounted and balanced. Yeah, I balanced them. I know it's not necessary, but for only another $3 a tire, why not.

20220526 185151


20220526 185144

 
P1K5Dave

P1K5Dave

Well-Known Member
Lifetime Member
Club Contributor
Jul 11, 2020
2,251
8,439
113
Petoskey, MI
Ownership

  1. 1000-5
I chopped my Bad Dawg bumper today.

When I went to the KM3s I also took out the 1.5" spacers from the front wheels (decided my front-end chassis parts were taking too much beating, trying to scale it back.)

I was rubbing the bumper occasionally at full lock and compression with the previous tires and spacers. Now I've been rubbing constantly on hard turns. Something to consider for anyone looking at running the Bad Dawg bumper with forward arms and 30s.

Anyhoo, I was reluctant to cut the bumper for aesthetics. It turns out, I think it looks better chopped! I always did think the Bad Dawg sat too low under the headlights, now with the ends cut off it's getting closer to the Warn bumper look.

I may cut it more, definitely if I still hear any rubbing.

20220709 132730


Before:

20220510 211228


After:

20220709 134248


20220709 193400
 
Last edited:
ToddACimer

ToddACimer

Pioneer 1005-2
Lifetime Member
Oct 7, 2016
3,680
15,578
113
Oshkosh, Wi
Ownership

  1. 1000-5
I like the cut look. I'd be tempted to add a pair of bars over the hood from the bumper to the a-pillar
 
Smitty335

Smitty335

Well-Known Member
Lifetime Member
Supporting Member
Oct 3, 2016
35,445
208,727
113
NWA Arkansas
Ownership

  1. 1000-3

  2. 1000-5
I chopped my Bad Dawg bumper today.

When I went to the KM3s I also took out the 1.5" spacers from the front wheels (decided my front-end chassis parts were taking too much beating, trying to scale it back.)

I was rubbing the bumper occasionally at full lock and compression with the previous tires and spacers. Now I've been rubbing constantly on hard turns. Something to consider for anyone looking at running the Bad Dawg bumper with forward arms and 30s.

Anyhoo, I was reluctant to cut the bumper for aesthetics. It turns out, I think it looks better chopped! I always did think the Bad Dawg sat too low under the headlights, now with the ends cut off it's getting closer to the Warn bumper look.

I may cut it more, definitely if I still hear any rubbing.

View attachment 342995

Before:

View attachment 342998

After:

View attachment 342997
Would you mind taking a measurement for me? I'm looking at one of these bumpers and pretty well settled on it. The top rail, I need to know what the widest light bar mounting locations would be for the bolt holes. I've got a 20 inch light bar. Thanks
 
  • Like
Reactions: JenElio
P1K5Dave

P1K5Dave

Well-Known Member
Lifetime Member
Club Contributor
Jul 11, 2020
2,251
8,439
113
Petoskey, MI
Ownership

  1. 1000-5
I'll have to check that for you on a few days, I keep it over at my buddy's place. I can tell you that my bar is a 15". Maybe I can find a closer pic of how it sits on the bar...
 
advertisement
P1K5Dave

P1K5Dave

Well-Known Member
Lifetime Member
Club Contributor
Jul 11, 2020
2,251
8,439
113
Petoskey, MI
Ownership

  1. 1000-5
Here's a zoom on that 15". Based on this, I
think you're going to have some difficulty mounting a 20", at least on the flat stretch of the bar.

0830201346b
 
  • Like
Reactions: Smitty335
P1K5Dave

P1K5Dave

Well-Known Member
Lifetime Member
Club Contributor
Jul 11, 2020
2,251
8,439
113
Petoskey, MI
Ownership

  1. 1000-5
It's a well-built bumper at a much better price point than most, and it met my top-mounted winch requirement.

The C-fab bumper is kind of the same style, but fits much better up under the headlights.
 
Last edited:
  • Like
Reactions: JenElio
WagginTail

WagginTail

Well-Known Member
Lifetime Member
Club Contributor
Oct 13, 2020
1,584
5,872
113
SC
Ownership

  1. 1000-5
Looks good. I like it better
 
  • Like
Reactions: P1K5Dave
P1K5Dave

P1K5Dave

Well-Known Member
Lifetime Member
Club Contributor
Jul 11, 2020
2,251
8,439
113
Petoskey, MI
Ownership

  1. 1000-5
Man, this Tusk skid plate is going to require some new cutouts to get it to stop storing so much mud. All bolts are getting replaced with stainless steel - I Broke one off trying to remove it, and also probably stripped out one of the threaded frame holes.

Maybe I can get some flange nuts welded into the frame sooner than later.

20220728 184843
 
Tie

Tie

Active Member
Jun 5, 2022
35
109
33
Toronto
Ownership

  1. 1000-5
Probably would be cool, but outside my tools and skills. :)
Dave, firstly thank you for your input on my flip-up flip-down question. Secondly good Sir, I have been reading your build and it seems like you, and others, have some fantastic knowledge and skills. I think your skills are admired by those of us who can make sure our tire pressure is good!
 
P1K5Dave

P1K5Dave

Well-Known Member
Lifetime Member
Club Contributor
Jul 11, 2020
2,251
8,439
113
Petoskey, MI
Ownership

  1. 1000-5
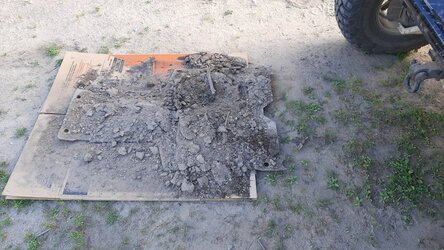
Skid plate got some new ventilation last night.

Everything that matters is still covered, and there's room for mud to wash out in the places it was collecting.

20220729 184819
 
P1K5Dave

P1K5Dave

Well-Known Member
Lifetime Member
Club Contributor
Jul 11, 2020
2,251
8,439
113
Petoskey, MI
Ownership

  1. 1000-5
I did front and rear brake pads yesterday, got a few notes to share with you all on brake wear.

This is my 5th brake pad change in 9,000 miles of riding. I've been using aftermarket pads that are generally less than half the cost of OEM pads. Here's what I've found:

The rear pads wear fastest. I can generally get 1500 miles max on a set of rear aftermarket pads. I've run them as long as 2200 miles (worn to metal) and most of the other changes were done around 1500 when they're not toast, but definitely ready to change out. This most recent change was 1300 miles, and they were all still in decent condition, it doesn't look like the squealers have hit yet but getting close.

I just used Honda OEM pads on the rear with this change, for the first time. My first impression is that they're going to be worth the extra money. You can tell just by looking at them how much more metallic they are. They almost look like a brass pad. Looking forward to seeing how long they wear.

The front pads, being much bigger, can easily run 2500 miles on aftermarket pads. Most of my replacements have been around 2200, when they still look just fine. This recent change is 2500, and it looks like one squealer just started making noise.
 
P1K5Dave

P1K5Dave

Well-Known Member
Lifetime Member
Club Contributor
Jul 11, 2020
2,251
8,439
113
Petoskey, MI
Ownership

  1. 1000-5
Oh, and I'm getting a lot faster at brake jobs, it's really pretty easy on this machine.

You can just remove one caliper bolt and swing the caliper up or down out of the way, swap out the pads, squeeze your piston back in with channel-locks, and swing it back over the rotor. Put the bolt back in and you're done.

I drop the bottom bolt on the front calipers and swing them up. On the back, I drop the top bolt and swing them down.
 
Last edited:
Spoonbill

Spoonbill

Well-Known Member
Lifetime Member
Apr 24, 2020
226
272
63
East TN
Ownership

  1. 1000-5
Incredible thread with great details here with much high value information. P1K5 Dave, how did you perform the alignment?? I can only do the toe in/out as I dont have the aftermarket A-Arms
 
advertisement

About us

  • Our community has been around for many years and pride ourselves on offering unbiased, critical discussion among people of all different backgrounds. We are working every day to make sure our community is one of the best.

User Menu

Buy us a beer!

  • Lots of time and money has gone into making sure the community is running the best software, best designs, and all the other bells and whistles. Care to buy us a beer? We'd really appreciate it!

    Beer Fund!

    Club Membership!