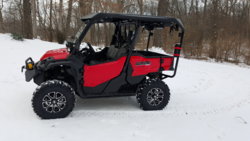
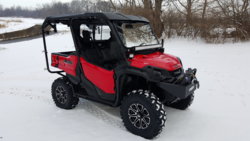
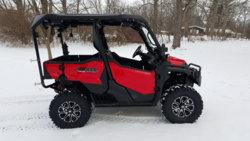
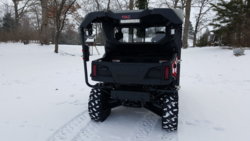
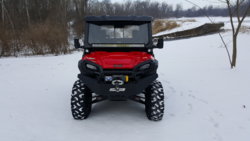
20160122_094255.jpg

P1000 Jackal's P1000-5

J

jstreun

New Member
May 1, 2016
10
2
3
sallisaw
I ended up getting about 1/2 my switches today, enough to play with in setting up the jumper lines for the whole set. What I have pictured below is incomplete (using two 4 switch banks instead of two 6 switch banks*) but serves the purpose for now in demonstrating on setting up the various switches. *Note to self when ordering from Amazon make sure it coming from USA not China or you wait 6 weeks, live n learn ;)

Switch Schematic for SVT switches:
View attachment 8468


So for the wiring pictured below here is the layout:
RED - Hot wire coming from Honda Black/White ignition keyed accessory wire to the switches power in terminal.
WHITE - Hot wire coming from Honda Brown light switch wire to switched backlit LED's - Switches light up when headlights on.
GREEN - Ground wire from switches to ground.
BLACK - jumper wire from Winch Power ON/OFF to Winch Momentary IN/OUT rocker - A secondary measure of killing power to winch solenoid.
View attachment 8469

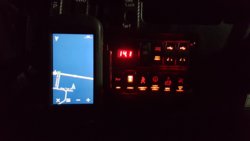
Initial testing, everything lights up perfect:
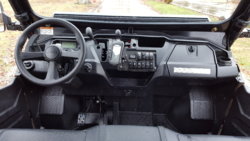
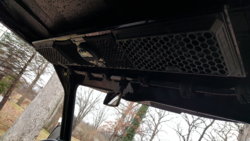
View attachment 8471 View attachment 8472 View attachment 8473

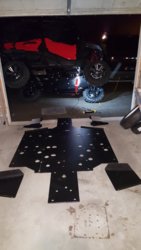
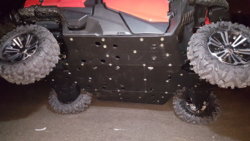
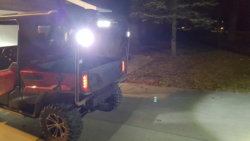
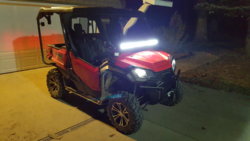
Well that's it for today, tomorrow will be installing the dual battery wiring kit with isolator, cutting out a temp switch plate from OEM skid plate material, mounting the switches in the switch plate & dash, installing (4)- 18 watt pod lights for front & rear added lighting, and maybe even getting around to getting the GPS installed.
jACKAL THANKS YES I HAVE WIRED MY PLATE THE SAME AS ABOVE. ONE QUESTON I HAVE IS ON THE 7 PIN SWITCH YOU HAVE IN INK PEN DRAWN ON SWITCH CARD INDICATING YOU WERE POSSIBLY JUMPING #3 AND # 6 AND #1 AND #4? IS THAT CORRECT? LAST QUESTION I DONT UNDERSTAND THE CARD WHEN IT STATES CONNECT #2 (+) FROM YOUR SOURCE AND #5 SAYS SAME THING DO I JUMP THOSE OR WHY IS THERE TWO. ALSO CONNECT #6 TO YOUR RELAY OR ACC.( PUSH DOWN SECOND APPLICATIONS) #3, 4, 6 ALL STATE THIS AND #1 HAS SAME EXCEPT ( PUSH UP APPLICATION). COULD YOU ELABORATE ON THIS LANGUAGE AS THERE ARE NOT PICS THAT I HAVE SEEN ON YOUR BUILD OF WIRING ONCE THE PDM IS ATTACHED. THANKS AGAIN FOR ALL YOUR HELP.
 
JACKAL

JACKAL

Ancient Honda fanboi
Moderator
Lifetime Member
Supporting Member
Club Contributor
Jun 11, 2015
39,969
273,461
113
Pioneer, TN
Ownership

  1. 1000-5

  2. Talon X4
jACKAL THANKS YES I HAVE WIRED MY PLATE THE SAME AS ABOVE. ONE QUESTON I HAVE IS ON THE 7 PIN SWITCH YOU HAVE IN INK PEN DRAWN ON SWITCH CARD INDICATING YOU WERE POSSIBLY JUMPING #3 AND # 6 AND #1 AND #4? IS THAT CORRECT? LAST QUESTION I DONT UNDERSTAND THE CARD WHEN IT STATES CONNECT #2 (+) FROM YOUR SOURCE AND #5 SAYS SAME THING DO I JUMP THOSE OR WHY IS THERE TWO. ALSO CONNECT #6 TO YOUR RELAY OR ACC.( PUSH DOWN SECOND APPLICATIONS) #3, 4, 6 ALL STATE THIS AND #1 HAS SAME EXCEPT ( PUSH UP APPLICATION). COULD YOU ELABORATE ON THIS LANGUAGE AS THERE ARE NOT PICS THAT I HAVE SEEN ON YOUR BUILD OF WIRING ONCE THE PDM IS ATTACHED. THANKS AGAIN FOR ALL YOUR HELP.


OK back to basic if you can't understand the pin out card that should have came with your switches,

There is 8 possible spades for the back of the rockers they are universally numbered as such:
8 7
1 4
2 5
3 6
as in top of picture here: 17083 7aa9fde911bcbb2f5862470b4f53aa8a

EACH SPADE DOES A DIFFERENT THING DEPENDING ON WHO MAKES IT!!! OTTRW is not the same as STV

This is ONLY for STV Switches here: 17084 7beeade91b05af18df6efc9c2c2f6e90


For a 7 Pin Rocker Switch from STV that is a momentary on UP and momentary on DOWN to run a winch in or out and back lighting you would wire it as follows:

Spade #7 connect to ground wire. (There is no #8 position spade)

Spade #2 & Spade #5
are for power source in - either from PDM or key on power source (Honda Black wire with white stripe) These can be jumped together, one wire in then jump to the other makes no different which one both have to have power in.

Spade #1 & Spade #4 are to Relay or accessory powered on when rocker is pressed UP (typically only need one of these, unless you are rocking double winches on same bumper)

Spade #3 & Spade #6 are to Relay or accessory powered on when rocker is pressed DOWN (typically only need one of these, unless you are rocking double winches on same bumper)

This type of rocker only lights up when you are holding the rocker up or down.


For a 5 Pin Rocker Switch from STV that is a ON / Off and back lighting you would wire it as follows:

Spade #7 & Spade #8 connect to ground wire. These can be jumped together, one wire in then jump to the other makes no different which one both have to go to a ground.

Spade #2 for power source in - either from PDM or key on power source (Honda Black wire with white stripe) These can be jumped together, one wire in then jump to the other makes no different which one both have to have power in.

Spade #6 is for Light source power in (Honda Brown wire) Switch will be backlit when lights are turned on only.

Spade #3 to Relay or accessory powered on when rocker is flipped ON or Up

There is no spade for positions #1, #4, #5 on the 5 terminal rocker switch.
 
R

RANGER1

New Member
Jul 18, 2016
5
0
1
TN
Ownership

  1. 1000-3

  2. 1000-5
Where are you located. I am close to royal blue.
 
JACKAL

JACKAL

Ancient Honda fanboi
Moderator
Lifetime Member
Supporting Member
Club Contributor
Jun 11, 2015
39,969
273,461
113
Pioneer, TN
Ownership

  1. 1000-5

  2. Talon X4
Where are you located. I am close to royal blue.
Literally on top of the mountain immediately West of the town Pioneer overlooking Elk Valley. 7 miles to I-75 exit 141 via TN 297 & TN 63
 
JACKAL

JACKAL

Ancient Honda fanboi
Moderator
Lifetime Member
Supporting Member
Club Contributor
Jun 11, 2015
39,969
273,461
113
Pioneer, TN
Ownership

  1. 1000-5

  2. Talon X4
Questions?
1. Did you drill into the roll cage and hood to mount your 4 cube lights?
2. Can you explain what the bellows are for on the differentials and transmission?


Sent from my iPhone using Tapatalk

No I didn't drill any holes to run wiring ran heavy insulation trailer wiring 14ga x 4 wires along ROPS to power rear light bars and pods.
Bellows were to eliminate possibility of contamination (water) entering via open vent tubes.
 
JACKAL

JACKAL

Ancient Honda fanboi
Moderator
Lifetime Member
Supporting Member
Club Contributor
Jun 11, 2015
39,969
273,461
113
Pioneer, TN
Ownership

  1. 1000-5

  2. Talon X4
Haven't posted any updates in a while currently addressing in cab heat. Insulation installed the right way under the plastic and double layer between seat belts next to head and header pipes along with 4" bilge fan. Removal of seat back and plastic cover between seat bottom and back. Insulation BEFORE it heats up the plastic next to the occupants.
20160729 110216

20160729 110211


Will post as insulation is installed. Why is it so hot normally because only 2" gap and 1/8" of plastic separate engine from occupants. 20160729 104702
 
  • Like
Reactions: CumminsPusher
CumminsPusher

CumminsPusher

Just a Honda doing Honda things.
Lifetime Member
Supporting Member
Club Contributor
Oct 14, 2015
42,062
322,675
113
Washington/Idaho
Ownership

  1. Other Brand

  2. 1000-5

  3. Talon X LV
Literally on top of the mountain immediately West of the town Pioneer overlooking Elk Valley. 7 miles to I-75 exit 141 via TN 297 & TN 63
The town of Pioneer! You hold back no punches:) I love it!


Sent from iPhone
 
  • Like
Reactions: joeymt33 and JACKAL
JACKAL

JACKAL

Ancient Honda fanboi
Moderator
Lifetime Member
Supporting Member
Club Contributor
Jun 11, 2015
39,969
273,461
113
Pioneer, TN
Ownership

  1. 1000-5

  2. Talon X4
Tired of tiny GPS screens, me too. How about a 10" GPS using an Android based tablet, ORUXMAPS app, and trail files. It is sweet!

20160729 110038

20160729 110035
 
  • Like
Reactions: BIGRACK
advertisement
BIGRACK

BIGRACK

Well-Known Member
Jan 22, 2016
202
376
63
Dayton Tenn
Haven't posted any updates in a while currently addressing in cab heat. Insulation installed the right way under the plastic and double layer between seat belts next to head and header pipes along with 4" bilge fan. Removal of seat back and plastic cover between seat bottom and back. Insulation BEFORE it heats up the plastic next to the occupants.
View attachment 19183
View attachment 19184

Will post as insulation is installed. Why is it so hot normally because only 2" gap and 1/8" of plastic separate engine from occupants. View attachment 19185
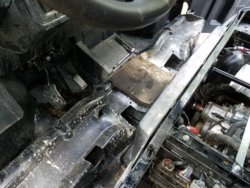
Jackal on the bulge fan placement Joey and myself angled fan to blow toward header /passenger side it seem to work better . You can feel air moving at rear tire area try engine off and running when it get warm great idea here.
 
  • Like
Reactions: joeymt33
solrus

solrus

Well-Known Member
Lifetime Member
Sep 2, 2015
1,629
2,511
113
Montana
Ownership

  1. 1000-5
Montana climate solves my heat problem .
Jackal, is it way more heat on p1000 vs p500?

Sent from my XT1585 using Tapatalk
 
JACKAL

JACKAL

Ancient Honda fanboi
Moderator
Lifetime Member
Supporting Member
Club Contributor
Jun 11, 2015
39,969
273,461
113
Pioneer, TN
Ownership

  1. 1000-5

  2. Talon X4
Jackal on the bulge fan placement Joey and myself angled fan to blow toward header /passenger side it seem to work better . You can feel air moving at rear tire area try engine off and running when it get warm great idea here.
Mine does the same you can feel it easily just inside the right rear shock blowing back even when cold.
 
  • Like
Reactions: BIGRACK
JACKAL

JACKAL

Ancient Honda fanboi
Moderator
Lifetime Member
Supporting Member
Club Contributor
Jun 11, 2015
39,969
273,461
113
Pioneer, TN
Ownership

  1. 1000-5

  2. Talon X4
Montana climate solves my heat problem .
Jackal, is it way more heat on p1000 vs p500?

Sent from my XT1585 using Tapatalk
With the glass windshield and hard rear panel yes P1K is considerably warmer. My P500 has the Honda tilt windshield crack it open at bottom P500 has no heat at all comparable to P1K.
 
JACKAL

JACKAL

Ancient Honda fanboi
Moderator
Lifetime Member
Supporting Member
Club Contributor
Jun 11, 2015
39,969
273,461
113
Pioneer, TN
Ownership

  1. 1000-5

  2. Talon X4
Ok so for the heatshield install I removed the seat bottom, seat back, and the plastic that spans the gap between the two.

All stripped down looks like this.
20160729 104650


Fitted front and side edges leaving 2" material tucked down front and sides held by OEM push rivets. Trimmed back and passenger sides, left center full length to fold down in back to double thickness between engine and center seat.
20160729 124512


All tucked in place.
20160729 124657


Center plastic piece back in place.
20160729 130652


Seat back in place.
20160729 133334


Bottom back in all done.
20160729 133519


To check sub transmission I cut out a 8"x8" flap then took a scrap piece 3" longer and wider glued to top of flap. Simply lift up to check oil level then let it rest on top seat holds firmly in place.

Material used was this:
ESP Low-E® EZ-Cool Car Insulation Kit(Includes 40 Sq. Ft Insulation, 10' Foil Tape): Heat and Sound Automotive Insulation For Your Car Restoration Projects - - Amazon.com

Enough for two machines for $33.
 
Last edited:
Crow_Hunter

Crow_Hunter

Well-Known Member
May 18, 2016
750
836
93
Riding a Canned Ham.
Ownership

  1. Do not currently own
Are you planning anything similar for the floorboard of the back passengers?

I have had the biggest complaints about that heat more than the front seat heat from riders. The seat heat doesn't bother me so far.

My complaint is the hot air in my face from the shifter (like someone breathing in my face, which I hate) and my back seat right hand passengers complain about the heat on their feet.

I am planning on doing the bilge blower but I wonder if some heat tape would help the back seat passengers. It doesn't look like there is a lot of room under there for much insulation.
 
JACKAL

JACKAL

Ancient Honda fanboi
Moderator
Lifetime Member
Supporting Member
Club Contributor
Jun 11, 2015
39,969
273,461
113
Pioneer, TN
Ownership

  1. 1000-5

  2. Talon X4
Are you planning anything similar for the floorboard of the back passengers?

I have had the biggest complaints about that heat more than the front seat heat from riders. The seat heat doesn't bother me so far.

My complaint is the hot air in my face from the shifter (like someone breathing in my face, which I hate) and my back seat right hand passengers complain about the heat on their feet.

I am planning on doing the bilge blower but I wonder if some heat tape would help the back seat passengers. It doesn't look like there is a lot of room under there for much insulation.

To do it right from me looking it over is to insulate the front wall where thier knees are, the panels under thier feet then remove the bed and do it between the plastic and metal frame that supports it. I may do that as I too have gotten complaints from rear passengers.
 
Crow_Hunter

Crow_Hunter

Well-Known Member
May 18, 2016
750
836
93
Riding a Canned Ham.
Ownership

  1. Do not currently own
To do it right from me looking it over is to insulate the front wall where thier knees are, the panels under thier feet then remove the bed and do it between the plastic and metal frame that supports it. I may do that as I too have gotten complaints from rear passengers.

I am going to add the bilge fan and put some tape under the "Not A Step" riser first and see how that goes. My wife is really cold natured so I think if I can knock just a little of the heat back right at her feet, she would be fine and actually like it in the winter. Which is another reason why I am hesitant to go too far on the insulation, she might start complaining that she is cold. :)
 
JACKAL

JACKAL

Ancient Honda fanboi
Moderator
Lifetime Member
Supporting Member
Club Contributor
Jun 11, 2015
39,969
273,461
113
Pioneer, TN
Ownership

  1. 1000-5

  2. Talon X4
I installed the ThrottleMaxx for the P500 / P700 on my P1K. Turns out I didn't have to modify it at all just enough room to bolt right on.
20160729 203943


Took it out for a 30 minute ride wished I had it on from day one. You can literally rest you heel against the back plastic wall and run it up to full throttle with ease. Need more control just slide your foot up 2 inches and you can finesse the throttle through the roughest sections by keeping your heel firmly planted.

Definitely recommend this product.
 
JACKAL

JACKAL

Ancient Honda fanboi
Moderator
Lifetime Member
Supporting Member
Club Contributor
Jun 11, 2015
39,969
273,461
113
Pioneer, TN
Ownership

  1. 1000-5

  2. Talon X4
Ok so for the heatshield install I removed the seat bottom, seat back, and the plastic that spans the gap between the two.

All stripped down looks like this.
View attachment 19196

Fitted front and side edges leaving 2" material tucked down front and sides held by OEM push rivets. Trimmed back and passenger sides, left center full length to fold down in back to double thickness between engine and center seat.
View attachment 19197

All tucked in place.
View attachment 19198


Center plastic piece back in place.
View attachment 19199

Seat back in place.
View attachment 19200


Bottom back in all done.
View attachment 19201

To check sub transmission I cut out a 8"x8" flap then took a scrap piece 3" longer and wider glued to top of flap. Simply lift up to check oil level then let it rest on top seat holds firmly in place.

Took this out for a test ride this evening ran about 30 minutes very satisfied with the results. The in cab noise was noticeably quieter and the heat in the seating area seems completely eliminated. In fact the only heat I did notice was coming from the drive select lever which I had never even noticed before. Will put it to the true test on a 6hr mountain trail ride Monday but I am very happy thus far.
 
advertisement

About us

  • Our community has been around for many years and pride ourselves on offering unbiased, critical discussion among people of all different backgrounds. We are working every day to make sure our community is one of the best.

User Menu

Buy us a beer!

  • Lots of time and money has gone into making sure the community is running the best software, best designs, and all the other bells and whistles. Care to buy us a beer? We'd really appreciate it!

    Beer Fund!

    Club Membership!